Kia Forte: Lighting System / Hazard Lamp Switch
Kia Forte 2019-2025 (BD) Service Manual / Body Electrical System / Lighting System / Hazard Lamp Switch
Repair procedures
| Inspection |
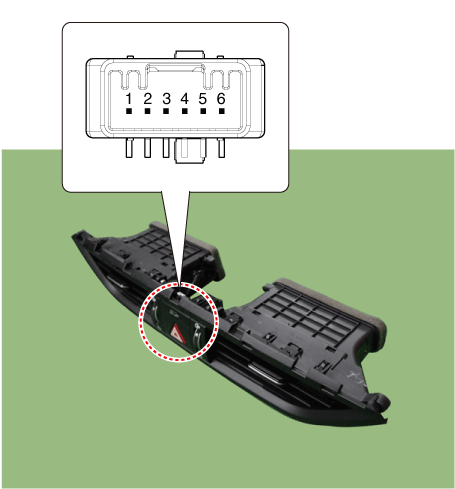
| 1. |
Check for continuity between terminals.
|
| Removal |
When removing with a flat-tip screwdriver or remover, wrap protective tape around the tools to prevent damage to components. |
| 1. |
Disconnect the negative (-) battery terminal. |
| 2. |
Remove the crash pad center garnish assembly. (Refer to Body - "Crash Pad Center Garnish assembly") |
| 3. |
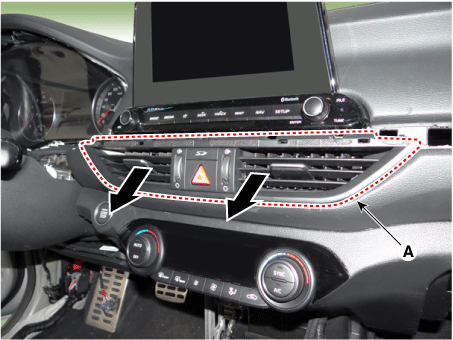
Remove the center fascia vent (A).
|
| 4. |
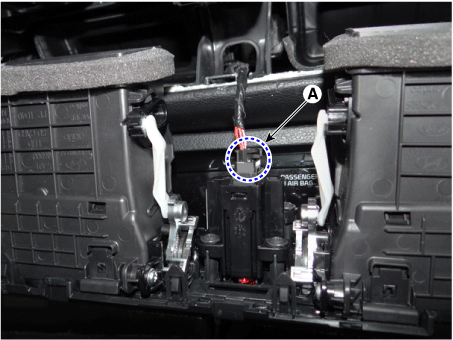
Disconnect the connector (A).
|
| 5. |
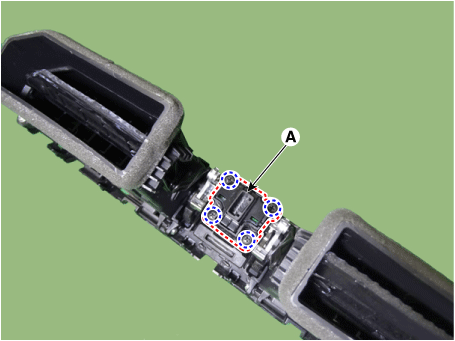
Remove the hazard lamp switch (A) after loosening the screws.
|
| Installation |
| 1. |
Install in the reverse order of removal. |
 Overhead Console Lamp
Repair procedures
Inspection
1.
Remove the overhead console lamp.
(Refer to Lighting System - "Overhead Console Lamp")
2.
Check for co ...
 Front Fog Lamps
Repair procedures
Removal
1.
Disconnect the negative (-) battery terminal.
2.
Remove the front bumper assembly.
(Refer to Body - "Front Bump ...
Other information:
Kia Forte 2019-2025 (BD) Service Manual: Trunk Trim
Components and components location Components [4 Door] 1. Rear transverse trim 2. Luggage covering mat 3. Luggage side trim [LH] 4. Luggage side trim [RH] 5. Rear package tray trim 6. Luggage partition side trim [5 Door] ...
Kia Forte 2019-2025 (BD) Owners Manual: Trunk
Opening the trunk 1.Make sure the shift lever is in P (Park, For Dual clutch transmission/ Intelligent Variable Transmission) or first gear or R (Reverse, For Manual Transmission) and set the parking brake. 2.Then do one of the following : - Press the Remote key or Smart Key Trunk U ...
Copyright © www.kiforte.com 2017-2025


