Kia Forte: Hood / Hood Latch
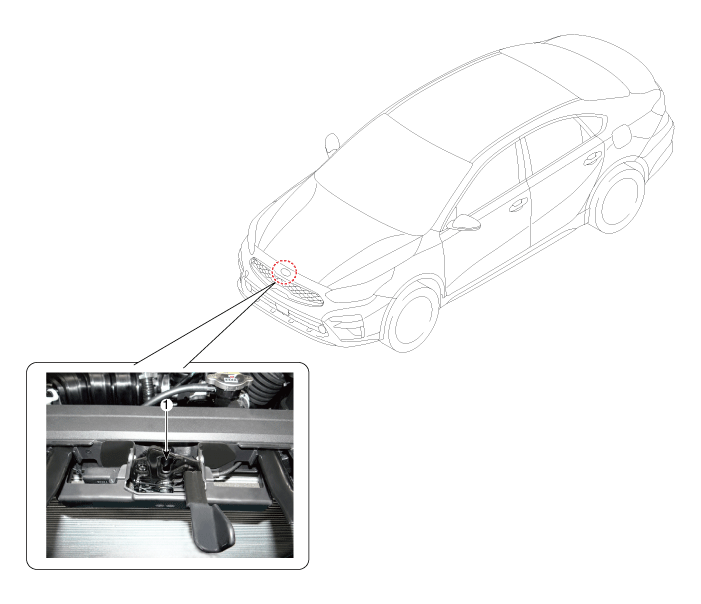
Components and components location
| Component Location |

| 1. Hood latch assembly |
Repair procedures
| Replacement |
[Hood lower latch assembly]
| 1. |
Remove the front bumper assembly. (Refer to Front Bumper - "Front Bumper Assembly") |
| 2. |
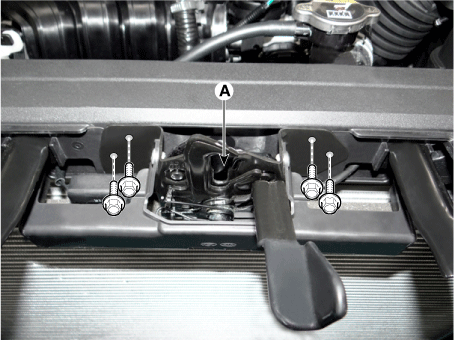
Loosen the mounting bolts and remove the hood latch assembly (A).
|
| 3. |
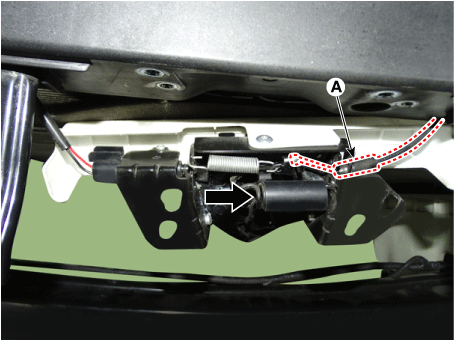
Disconnect the hood latch cable (A).
|
| 4. |
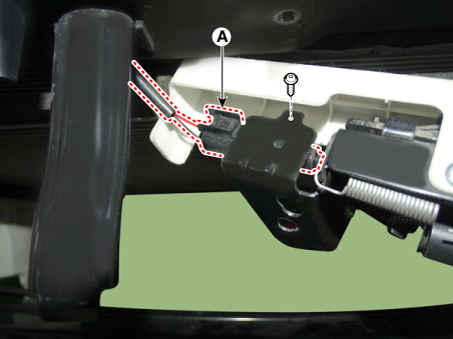
Disconnect the hood latch connector (A), then remove the mounting screw.
|
| 5. |
To install, reverse the removal procedure.
|
 Hood Latch Release Handle
Components and components location
Component Location
1. Hood latch release handle
Repair procedures
Replacement
1.
Remo ...
 Tailgate
Repair procedures
Adjustment
1.
After loosening the tailgate hinge (A) mounting bolt, adjust the tailgate
by moving it up or down, or right or left.
...
Other information:
Kia Forte 2019-2025 (BD) Owners Manual: Turn signals and lane change signals
The ignition switch must be on for the turn signals to function. To turn on the turn signals, move the lever up or down (A). The green arrow indicators on the instrument panel indicate which turn signal is operating. They will self-cancel after a turn is completed. If the indicator co ...
Kia Forte 2019-2025 (BD) Owners Manual: Road warning
Hazard warning flasher The hazard warning flasher serves as a warning to other drivers to exercise extreme caution when approaching, overtaking, or passing your vehicle. It should be used whenever emergency repairs are being made or when the vehicle is stopped near the edge of a ro ...
Copyright © www.kiforte.com 2017-2025


