Kia Forte: Front Suspension System / Front Stabilizer Bar
Repair procedures
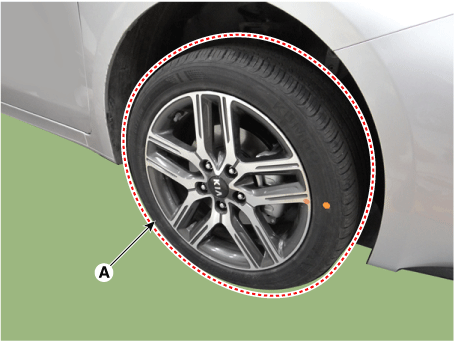
| 1. |
Remove the front wheel and tire (A).
|
Tightening torque :
107.9 - 127.5 N·m (11.0 - 13.0 kgf·m, 79.6 - 94.0 lb·ft)
|
|
Be careful not to damage to the hub bolts when removing the front
wheel and tire.
|
|
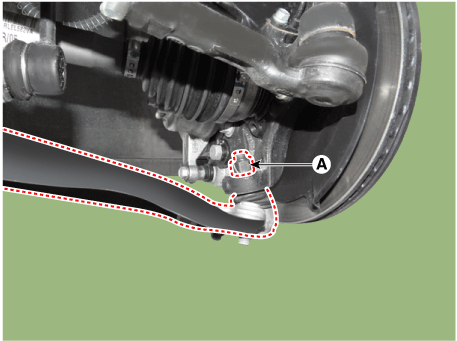
| 2. |
Loosen the nut and then disconnect the stabilizer bar link (A).
|
Tightening torque:
98.1 - 117.7 N·m (10.0 - 12.0 kgf·m, 72.3 - 86.8 lb·ft)
|
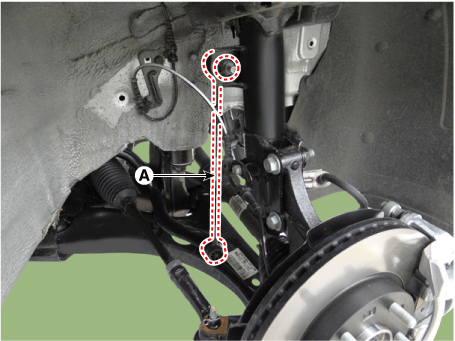
| •
|
When loosening the nut, fix the outer hexagon of stabilizer
bar link.
|
| •
|
Be careful not to damage the stabilizer link boots.
|
|
|
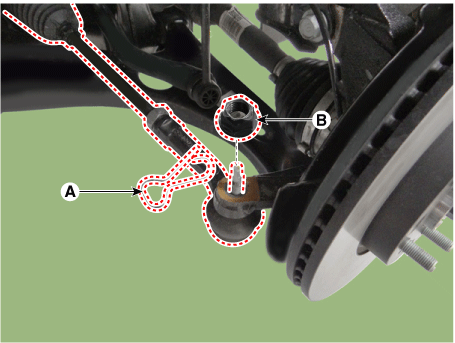
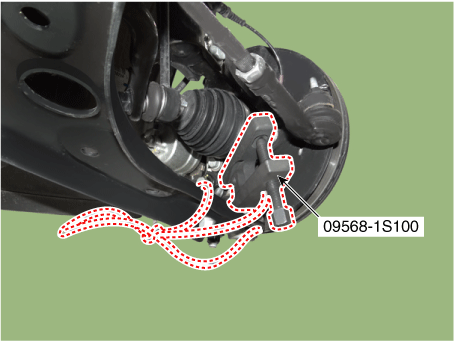
| 3. |
Disconnect the tie rod end ball joint from the knuckle by using the SST
(09568-1S100).
| (1) |
Remove the split pin (A).
|
| (2) |
Remove the castle nut (B).
|
Tightening torque:
34.3 - 44.1 N·m (3.5 - 4.5 kgf·m, 25.3 - 32.5 lb·ft)
|
|
| (3) |
Disconnect the tie rod end ball joint from the knuckle by using
the SST (09568-1S100).
|
|
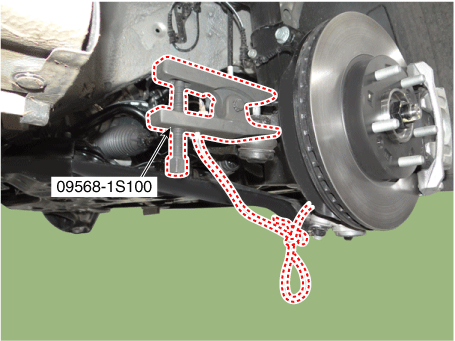
| 4. |
Detach the front lower arm from the front knuckle using the SST (09568-1S100).
| (1) |
Remove the lower arm nut (A).
|
Tightening torque:
58.8 - 70.6 N·m (6.0 - 7.2 kgf·m, 43.4 - 52.1 lb·ft)
|
|
| (2) |
Detach the front lower arm from the front knuckle using the SST
(09568-1S100).
|
• |
When using SST, be sure not to damage the dust
cover of lower arm ball joint.
|
|
• |
Keep SST tied to the car because there is a risk
of injury by dropping the SST during removing the
lower arm ball joint.
|
|
• |
The peripheral parts may be damaged when removing
the lower arm ball joint with a general tool such
as lever, so be sure to use SST.
|
|
|
|
| 5. |
Loosen the bolt (A) and then disconnect the universal joint (B).
|
Tightening torque:
32.4 - 37.3 N·m (3.3 - 3.8 kgf·m, 23.9 - 27.5 lb·ft)
|
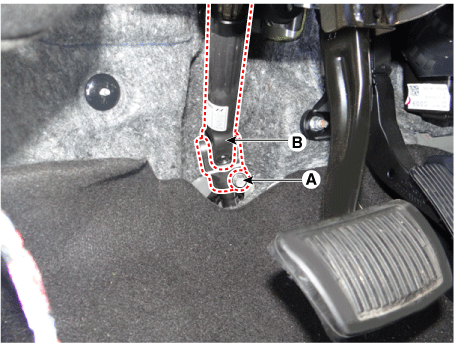
| •
|
Lock the steering wheel in the straight ahead position
to prevent the damage of the clock spring inner cable.
|
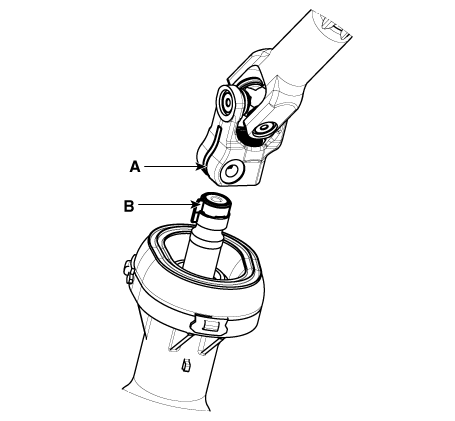
| •
|
When assembling, insert the shark pin (B) into the universal
joint yoke slot (A) as the below illustration.
|
|
|
| 6. |
Remove the roll rod bracket mounting bolt (A).
|
Tightening torque:
107.9 - 127.5 N·m (11.0 - 13.0 kgf·m, 79.6 - 94.0 lb·ft)
|
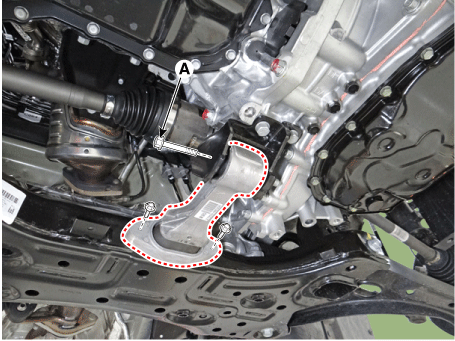
|
| 7. |
Disconnect the front muffler rubber hanger (A).
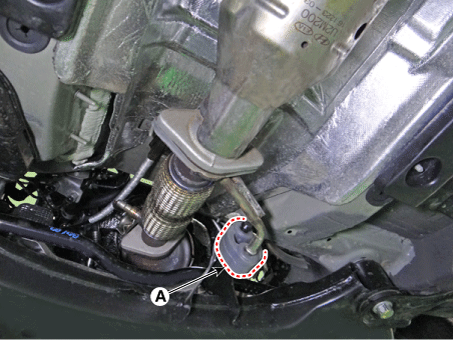
|
| 8. |
Support the sub frame (A) with a jack and then remove the sub frame bolts
and nuts.
|
Tightening torque:
Bolts (B), Nuts (C) : 44.1 - 53.9 N·m (4.5 - 5.5 kgf·m, 32.5
- 39.8 lb·ft)
Bolts (D), Nuts (E) : 176.5 - 196.1 N·m (18.0 - 20.0 kgf·m, 130.2
- 144.7 lb·ft)
|
|
| 9. |
Remove the sub frame (A).
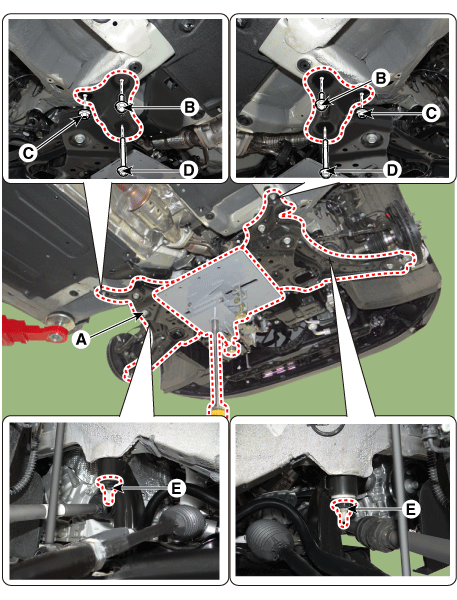
|
| 10. |
Loosen the bolts and then remove the stabilizer bar (A).
|
Tightening torque:
44.1 - 53.9 N·m (4.5 - 5.5 kgf·m, 32.5 - 39.8 lb·ft)
|

|
| 11. |
Loosen the nut (A) and then remove the stabilizer link.
|
Tightening torque:
98.0 - 117.6 N·m (10.0 - 12.0 kgf·m, 72.3 - 86.7 lb·ft)
|
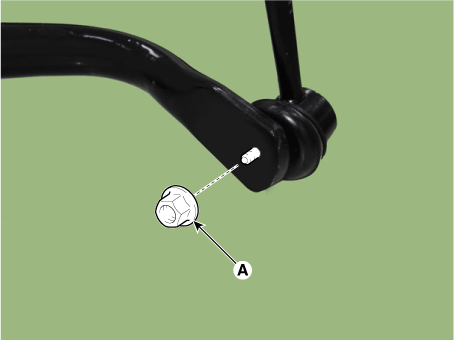
| •
|
When loosening the nut (A), fix the outer hexagon of
stabilizer bar link.
|
| •
|
Be careful not to damage the stabilizer link boots.
|
|
|
| 12. |
Install in the reverse order of removal.
|
| 13. |
Check the wheel alignment.
(Refer to Front Suspension System - "Front Alignment")
|
| 1. |
Check the bushing for wear and deterioration.
|
| 2. |
Check the front stabilizer bar for deformation.
|
| 3. |
Check the front stabilizer link ball joint for damage.
|
Repair procedures
Removal and Installation
1.
Remove the front wheel and tire (A).
Tightening torque:
107.9 - 127.5 N·m (11.0 - 13.0 kgf·m, 79.6 ...
Repair procedures
Removal and Installation
1.
Remove the front wheel and tire (A).
Tightening torque :
107.9 - 127.5 N·m (11.0 - 13.0 kgf·m, 79. ...
Other information:
Front air bags
Front air bags are designed to inflate
in a frontal collision depending on
the intensity, speed or angles of
impact of the front collision.
Side and/or curtain air bags
Side and/or curtain air bags are
designed to inflate when an impact is
detected by side collision ...
Repair procedures
Removal and Installation
1.
Remove the front wheel and tire (A).
Tightening torque:
107.9 - 127.5 N·m (11.0 - 13.0 kgf·m, 79.6 - 94.0 lb·ft)
...

 Front Lower Arm
 Sub Frame