Kia Forte: Front Seat / Front Seat Frame Assembly
Components and components location
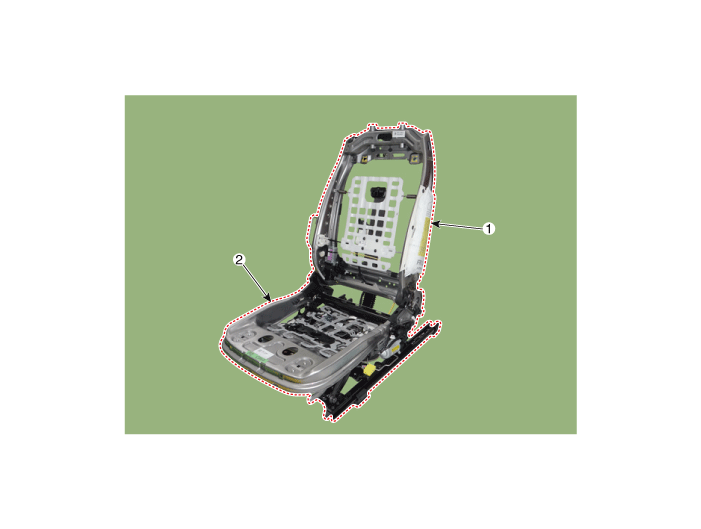
1. Front seat back frame assembly
|
2. Front seat cushion frame assembly
|
Repair procedures
|
Put on gloves to prevent hand injuries.
|
| • |
When removing with a flat - tip screwdriver or remover, wrap
protective tape around the tools to prevent damage to components.
|
| • |
Use a plastic panel removal tool to remove interior trim pieces
without marring the surface.
|
| • |
Take care not to bend or scratch the trim and panels.
|
|
| 1. |
Remove the front seat back cover.
(Refer to Front Seat - "Front Seat Back Cover")
|
| 2. |
Remove the front seat cushion cover.
(Refer to Front Seat - "Front Seat Cushion Cover")
|
| 3. |
Remove the side airbag (SAB) module.
(Refer to Airbag Module - "Side Airbag (SAB) Module")
|
| 4. |
Remove the lumbar support assembly.
(Refer to Body Electrical System - "Lumbar Support Unit")
|
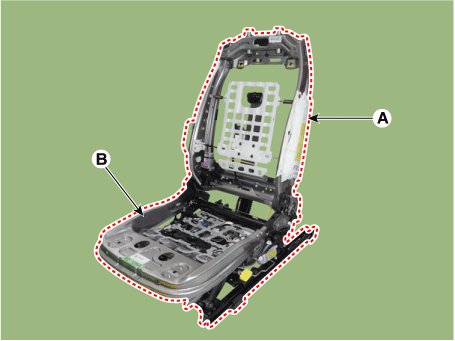
| 5. |
After loosening the mounting bolts, detach the front seat back frame
assembly (A) from the front seat cushion frame assembly (B).
|
Tightening torque :
44.1 - 53.9 N·m (4.5 - 5.5 Kgf·m, 32.5 - 39.8 lb·ft)
|
|
| 6. |
To install, reverse the removal procedure.
| •
|
For the seat equipped with side airbag, remove the side
airbag from the seat frame assembly.
(Refer to Restraint - "Side Airbag (SAB) Module")
|
| •
|
Before service, be fully aware of precautions and service
procedure relevant to air bag.
(Refer to Restraint - "Side Airbag (SAB) Module")
|
|
|
Components and components location
Component Location
1. Front seat cushion cover
Repair procedures
Replacement
...
Components and components location
Components
[Rear seat bench type]
1. Rear seat headrest
2. Rear seat headrest guide
3. Rear seat back frame & Pad
4. ...
Other information:
Components and components location
Component Location
1. Rear center seat belt retractor
Repair procedures
Replacement
When installing the belt, make sure not to da ...
The ignition switch must be on for the
turn signals to function. To turn on
the turn signals, move the lever up or
down (A). The green arrow indicators
on the instrument panel indicate
which turn signal is operating.
They will self-cancel after a turn is
completed. If the indicator co ...


 Front Seat Cushion Cover
 Rear Seat