Kia Forte: Engine Mechanical System / Cylinder Head Assembly

Kia Forte 2019-2024 (BD) Service Manual / Engine Mechanical System / Cylinder Head Assembly

Components and components location
Components

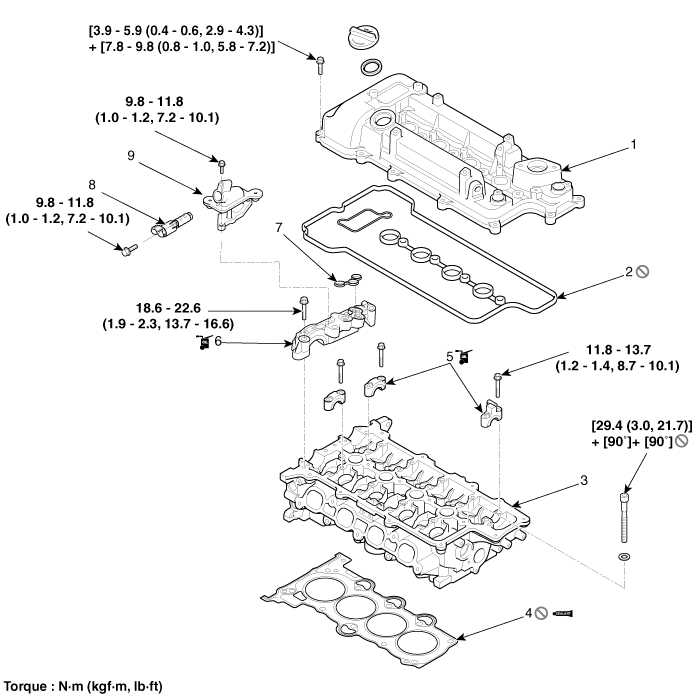
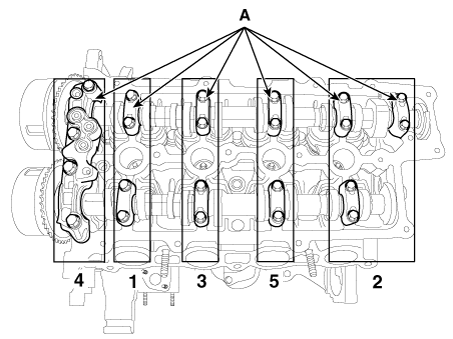
1. Cylinder head cover
2. Cylinder head cover gasket
3. Cylinder head assembly
4. Cylinder head gasket
5. Camshaft bearing cap
6. Camshaft front bearing cap
7. O-ring
8. Exhaust OCV (Oil Control Valve)
9. Exhaust OCV (Oil Control Valve) adapter

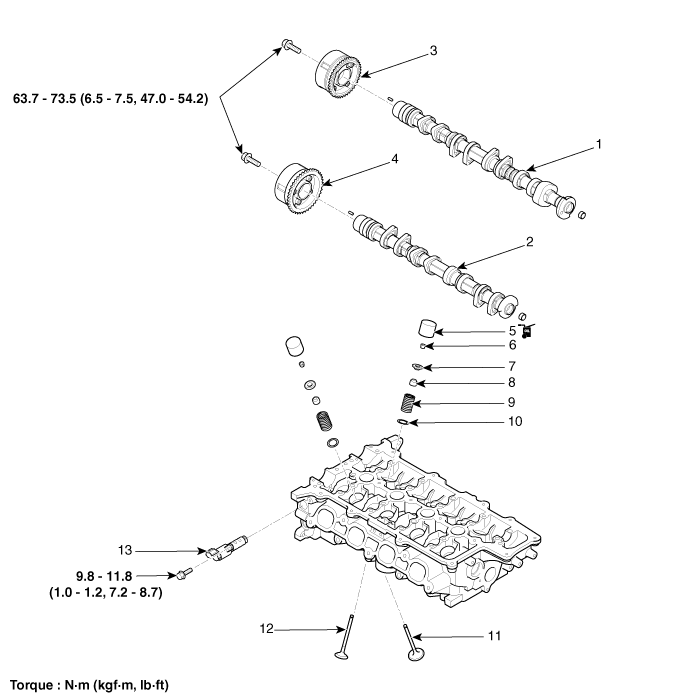
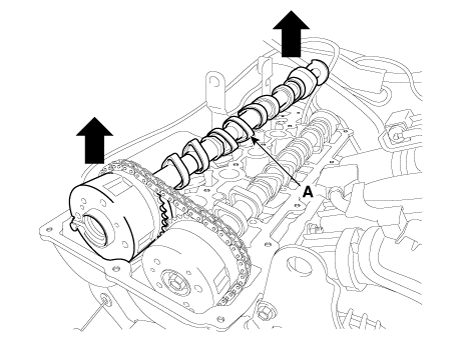
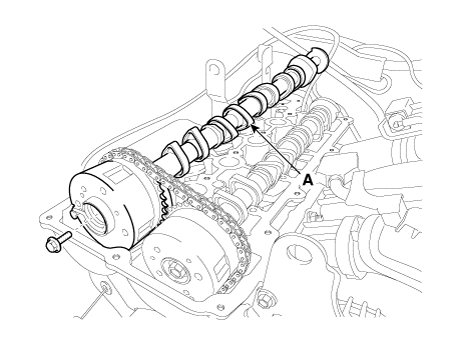
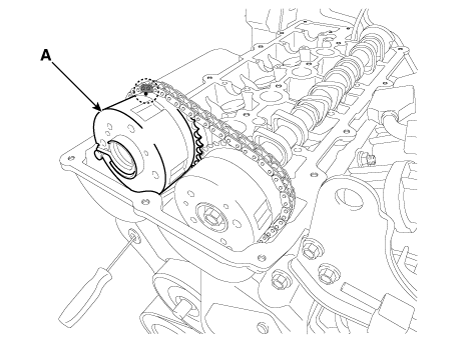
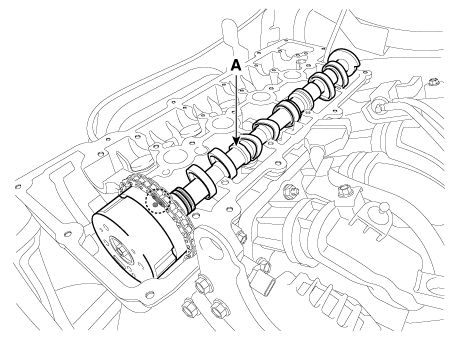
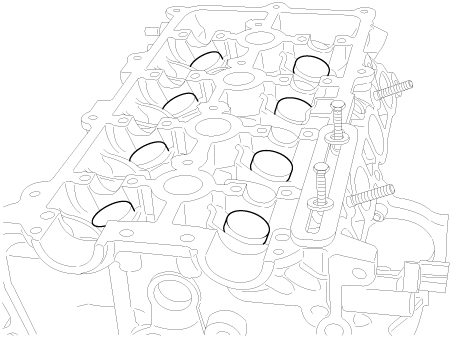
1. Exhaust camshaft
2. Intake camshaft
3. Exhaust CVVT assembly
4. Intake CVVT assembly
5. Mechanical Lash Adjuster (MLA)
6. Retainer lock
7. Retainer
8. Valve stem seal
9. Valve spring
10. Valve spring seat
11. Intake valve
12. Exhaust valve
13. Intake Oil Control Valve (OCV)

Valve clearance adjustment
Valve Clearance Inspection And Adjustment
  

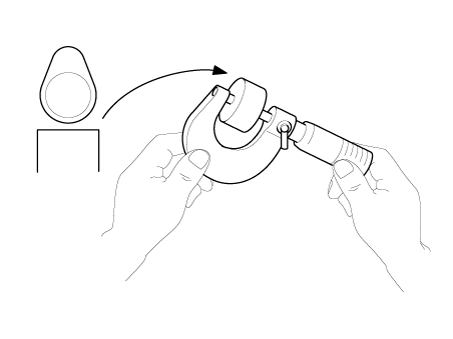
Inspect and adjust the valve clearance when the engine is cold (Engine coolant temperature : 20°C) and cylinder head is installed on the cylinder block.

1.

Remove the cylinder head cover.

(Refer to Cylinder Head Assembly - "Cylinder Head Cover")
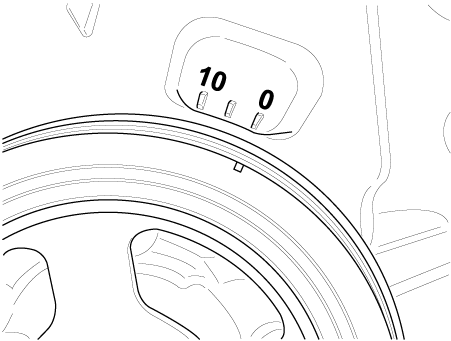
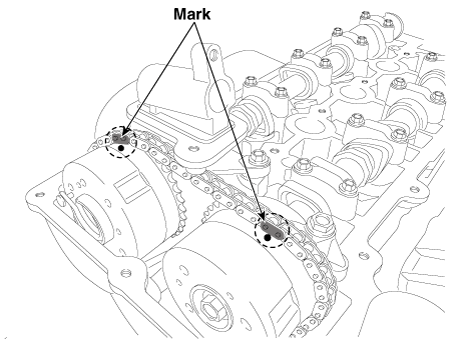
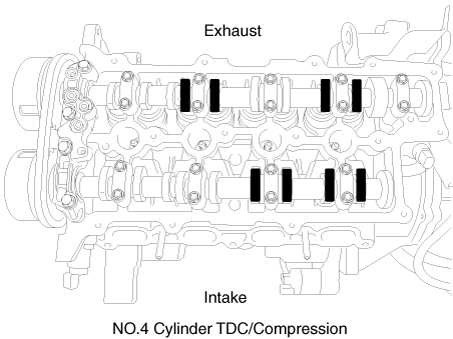
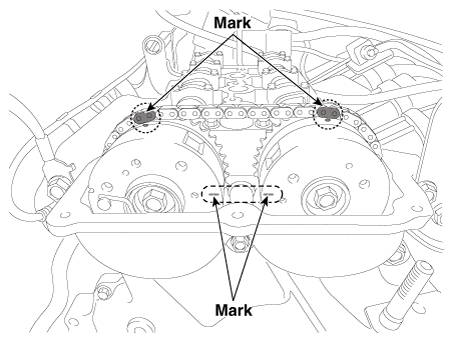
2.

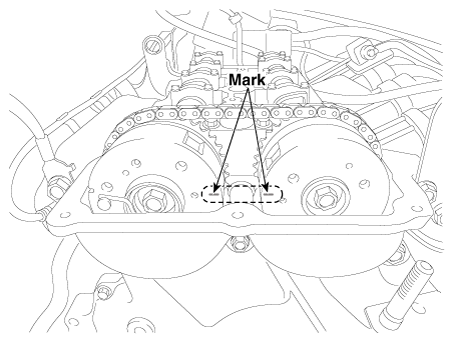
Set No.1 cylinder to TDC/compression.
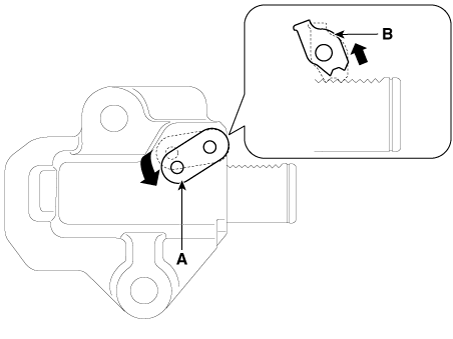
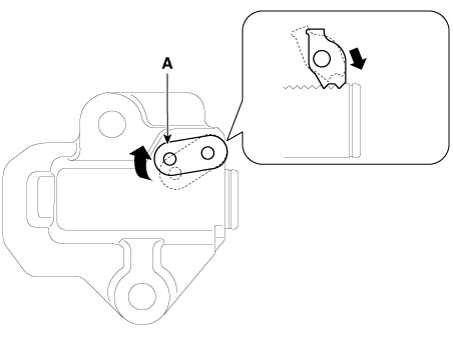
(1)

Turn the crankshaft pulley and align its groove with the timing mark of the timing chain cover.

(2)

Check that the marks of the intake and exhaust CVVT sprockets are in straight line on the cylinder head surface as shown in the illustration. If not, turn the crankshaft one revolution (360°).


Do not turn the crankshaft damper pulley counterclockwise.

(3)

Mark the timing chain links corresponding to the timing marks on the CVVT sprockets with a indelible marker.

3.

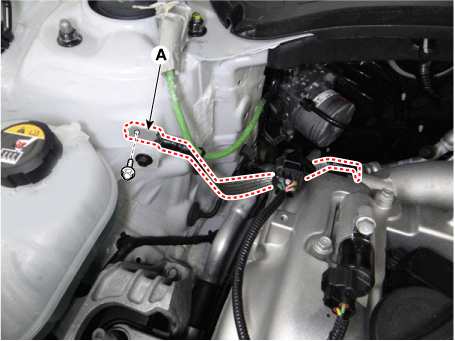
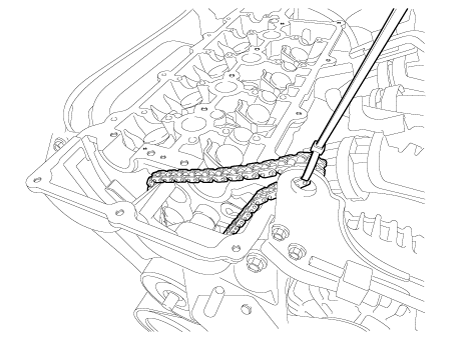
Remove the exhaust oil control valve (OCV) adaptor (A).

4.

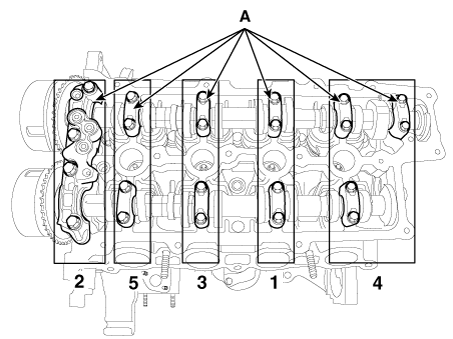
Inspect the valve clearance.
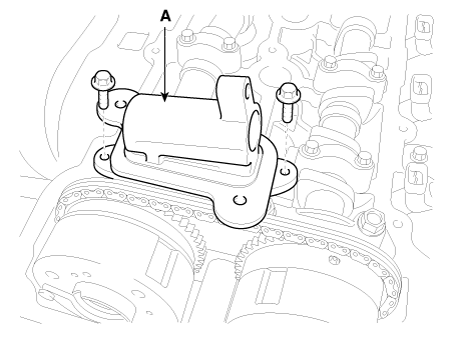
(1)

Check only the intake valves of the 1st and 2nd cylinders and exhaust valves of the 1st and 3rd cylinders for their clearance.

Using a thickness gauge, measure the clearance between the tappet and the base circle of camshaft.

Record the out - of - specification valve clearance measurements. They will be used later to determine the required tappet for adjusting.

Valve clearance specification (Engine coolant temperature : 20°C [68°F])

Limit

Intake : 0.17 - 0.23 mm (0.0067 - 0.0091 in.)

Exhaust : 0.32 - 0.38 mm (0.0126 - 0.0150 in.)

(2)

Turn the crankshaft pulley one revolution (clockwise 360°) and align its groove with timing mark of the timing chain cover.

(3)

Check the intake valves of the 3rd and 4th cylinders and exhaust valves of the 2nd and 4th cylinders for their clearance.

5.

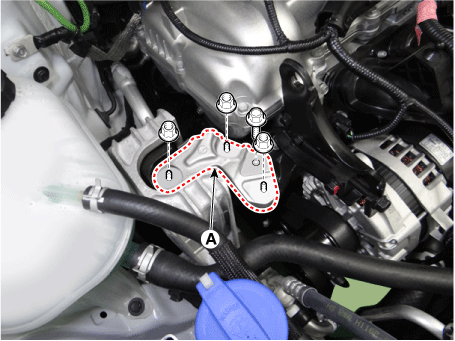
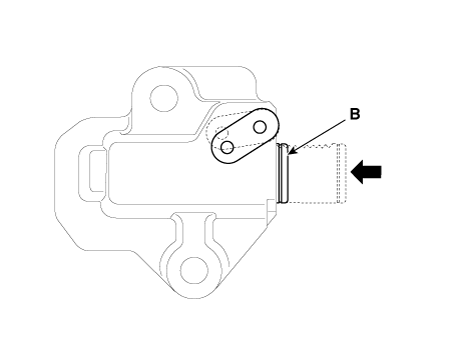
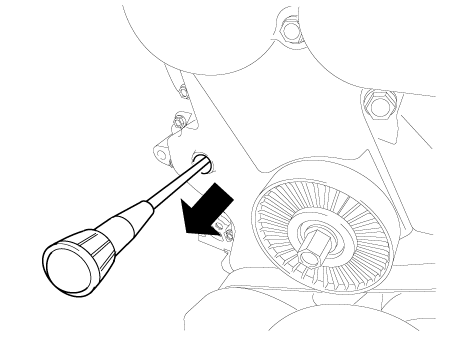
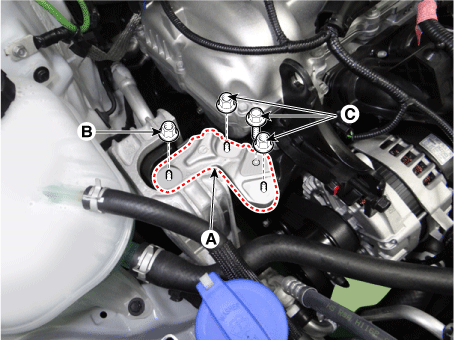
Remove the engine mounting support bracket.

(1)

Put a jack under the oil pan.


Place a wooden block between the jack and the oil pan to prevent damage to the oil pan.

(2)

Remove the engine ground cable (A).

(3)

Remove the engine mounting support bracket (A).

(4)

Lift the engine slightly using the jack to obtain space for releasing the timing chain tensioner.

6.

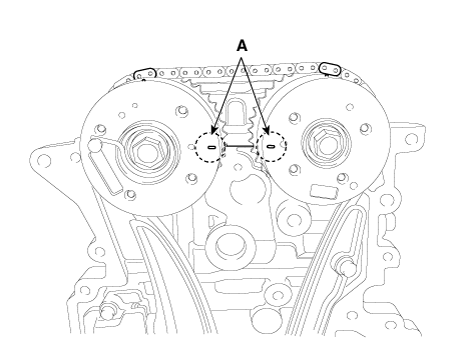
Adjust the intake and exhaust valve clearance.

(1)

Remove the bolt (A) from the service hole in the timing chain cover.

(2)

Lock the timing chain tensioner in the fully retracted position.

Insert a pick into the service hole in the timing chain cover and lower the hole in the left side of the ratchet plate (A) on the tensioner to allow the pawl (B : located inside the tensioner behind the ratchet plate) to be lifted.

(3)

Remove the camshaft bearing caps (A) with the order below.

(4)

With the pawl lifted, have a helper pull up the exhaust CVVT & camshaft (A) to allow the tensioner plunger (B) to retract.

(5)

With the tensioner plunger in the fully retracted position, raise the hole in the left side of the ratchet plate (A) again through the service hole in the chain cover to align the ratchet plate hole with the hole in the tensioner body behind the ratchet plate, then lock the tensioner by inserting the pick through the ratchet plate and tensioner body holes.

(6)

Separate the exhaust camshaft (A) from the exhaust CVVT by removing the bolt.

(7)

Remove the exhaust CVVT (A) from the timing chain.

(8)

Remove the intake CVVT & camshaft (A).


Fasten the timing chain to the engine hanger with a cable tie or strap not to allow the timing chain to fall down when removing the intake CVVT & camshaft.

(9)

Remove the tappet(s) in out - of - specification valve clearance from the cylinder head.

(10)

Measure the thickness of the removed tappet using a micrometer.

(11)

Calculate the thickness of a new tappet so that the valve clearance comes within the specificified value.

Valve clearance (Engine coolant temperature : 20°C)

T : Thickness of removed tappet

A : Measured valve clearance

N : Thickness of new tappet

Intake : N = T + [A - 0.20 mm (0.0079 in.)]

Exhaust : N = T + [A - 0.25 mm (0.0098 in.)]

(12)

Select a new tappet with a thickness as close as possible to the calculated value.


Shims are available in 41 size increments of 0.015 mm (0.0006in.) from 3.00 mm (0.118in.) to 3.690 mm (0.1417 in.)

(13)

Place a new tappet on the cylinder head.

(14)

Install the intake CVVT & camshaft (A), with the timing mark on the intake CVVT sprocket aligned with the mark (painted link) on the timing chain.

(15)

Install the exhaust CVVT (A), with the timing mark on the exhaust CVVT sprocket aligned with the mark (painted link) on the timing chain.

(16)

Install the exhaust camshaft (A) to the exhaust CVVT.

(17)

Remove the pick from the service hole in the timing chain cover.

(18)

Check that each timing mark of the intake and exhaust CVVT sprockets is aligned as shown in the picture.

(19)

Install the bolt (A) to the service hole in the timing chain cover.

Tightening torque :

27.5 - 30.4 N·m (2.8 - 3.1 kgf·m, 20.3 - 22.4 lb·ft)

(20)

Install the engine mounting support bracket.

(1)

Install the engine mounting support bracket (A).

Tightening torque

Nut (B) :

88.3 - 107.9 N·m (9.0 - 11.0 kgf·m, 65.1 - 79.6 lb·ft)

Bolt and Nuts (C) :

58.8 - 73.5 N·m (6.0 - 7.5 kgf·m, 43.4 - 54.2 lb·ft)

(2)

Install the engine ground cable (A).

(3)

Remove the jack from the oil pan.

(21)

Install the camshaft bearing caps with the order below.

Tightening torque

M6 bolts :

11.8 - 13.7 N·m (1.2 - 1.4 kgf·m, 8.7 - 10.1 lb·ft)

M8 bolts :

18.6 - 22.6 N·m (1.9 - 2.3 kgf·m, 13.7 - 16.6 lb·ft)

(22)

Turn the crankshaft two turns in the operating direction (clockwise) and check that the marks of the intake and exhaust CVVT sprockets are in straight line on the cylinder head surface.

(23)

Recheck the valve clearance.

Valve clearance (Engine coolant temperature : 20°C)

[Specification]

Intake : 0.17 - 0.23 mm (0.0067 - 0.0091 in.)

Exhaust : 0.22 - 0.28 mm (0.0087 - 0.0110 in.)

(24)

Install the exhaust oil control valve (OCV) adaptor (A).

Tightening torque :

9.8 - 11.8 N·m (1.0 - 1.2 kgf·m, 7.2 - 8.7 lb·ft)

(25)

Install the cylinder head cover.

(Refer to Cylinder Head Assembly - "Cylinder Head Cover")

Cylinder Block
Repair procedures Disassembly    • Use fender covers to avoid damaging painted surfaces. ...

Cylinder Head Cover
Components and components location Components 1. Cylinder head cover 2. Cylinder head cover gasket 3. Oil cap 4. Cup packing Repair procedures ...

Other information:

Kia Forte 2019-2024 (BD) Service Manual: Front Pillar Trim


Components and components location Component Location 1. Front pillar trim Repair procedures Replacement    Put on gloves to prevent hand injuries. ...

Kia Forte 2019-2024 (BD) Service Manual: Engine Room Under Cover


Repair procedures Removal and Installation 1. Remove the engine room under cover (A). Tightening torque : 3.9 - 5.9 N·m (0.4 - 0.6 kgf·m, 2.9 - 4.3 lb·ft) 2. Install in the reverse order of re ...

Copyright © www.kiforte.com 2017-2024