Kia Forte: Interior Trim / Center Pillar Trim
Components and components location
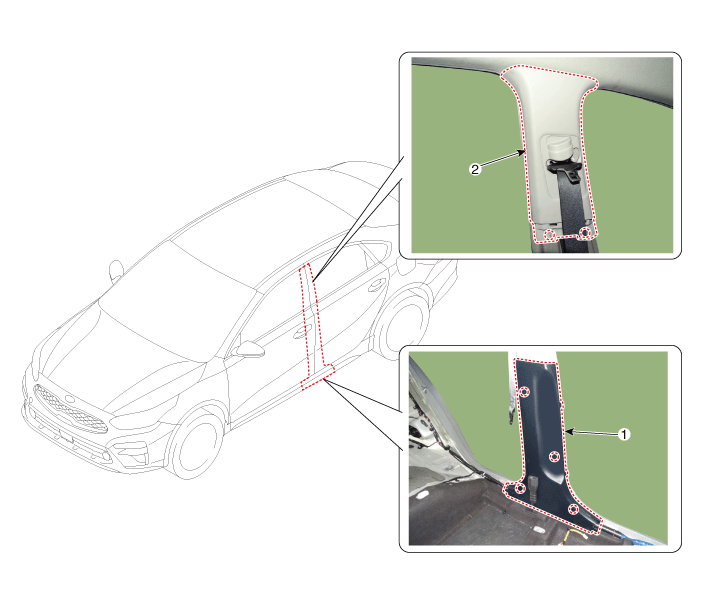
1. Center pillar lower trim
|
2. Center pillar upper trim
|
Repair procedures
[Center pillar lower trim]
| • |
Put on gloves to prevent hand injuries.
|
|
| • |
When removing with a flat - tip screwdriver or remover, wrap
protective tape around the tools to prevent damage to components.
|
| • |
When removing the interior trim pieces, use a plastic panel removal
tool not to damage the surface.
|
| • |
Take care not to bend or scratch the trim and panels.
|
|
| 1. |
Carefully remove the front door body side weatherstrip.
|
| 2. |
Carefully remove the rear door body side weatherstrip.
|
| 3. |
Remove the front door scuff trim.
(Refer to Interior Trim - "Door Scuff Trim")
|
| 4. |
Remove the rear door scuff trim.
(Refer to Interior Trim - "Door Scuff Trim")
|
| 5. |
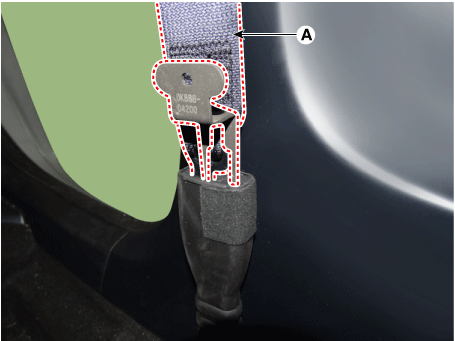
Remove the seat belt (A) from the EFD system by using the SST (0K888-D4200).
|
| 6. |
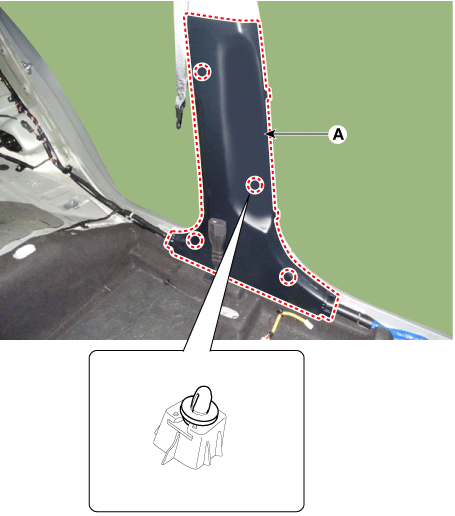
Using a screwdriver or remover, remove the center pillar lower trim (A).
|
| 7. |
To install, reverse the removal procedure.
|
Replace any damaged clips (or pin - type retainers).
|
|
[Center pillar upper trim]
|
Put on gloves to prevent hand injuries.
|
| • |
When removing with a flat - tip screwdriver or remover, wrap
protective tape around the tools to prevent damage to components.
|
| • |
When removing the interior trim pieces, use a plastic panel removal
tool not to damage the surface.
|
| • |
Take care not to bend or scratch the trim and panels.
|
|
| 1. |
Remove the center pillar lower trim.
(Refer to Interior Trim - "Center Pillar Trim")
|
| 2. |
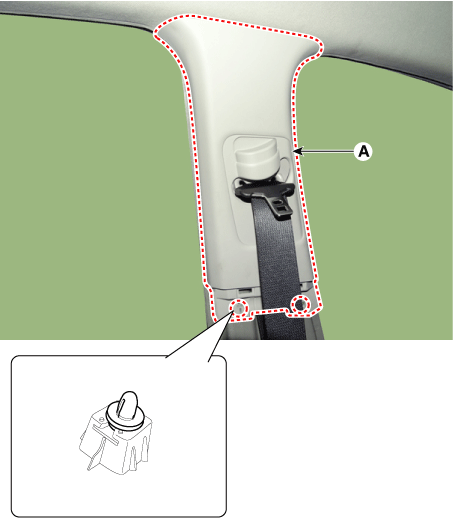
Using a screwdriver or remover, remove the center pillar upper trim (A).
|
| 3. |
To install, reverse the removal procedure.
|
Replace any damaged clips (or pin - type retainers).
|
|
Components and components location
Component Location
1. Front pillar trim
Repair procedures
Replacement
&nbs ...
Components and components location
Component Location
[4 Door]
1. Rear pillar trim
[5 Door]
1. Rear pillar trim
Rep ...
Other information:
Cancelled manually
The smart cruise control is temporarily
canceled when the brake pedal is
depressed or the CANCEL button is
pressed. Depress the brake pedal
and press the CANCEL button at the
same time when the vehicle is at a
standstill. The speed and vehicle to
vehicle distance ...
Components and components location
Component Location
1. Cowl cross bar assembly
Repair procedures
Replacement
Put on gloves to prevent hand injuries.
...


 Front Pillar Trim
 Rear Pillar Trim