Kia Forte: Timing System / Timing Chain Cover
Components and components location
| Components |

| 1. Timing chain cover |
Repair procedures
| Removal |
In case of removing the high pressure fuel pump, high pressure fuel pipe, delivery pipe, and injector, there may be injury caused by leakage of the high pressure fuel. So don’t do any repair work right after engine stops. |

|

Mark all wiring and hoses to avoid misconnection. |

| 1. |
Disconnect the battery negative terminal. |
| 2. |
Remove the engine cover. (Refer to Engine and transmission Assembly - "Engine Cover") |
| 3. |
Remove the air cleaner assembly. (Refer to Intake and Exhaust System - "Air Cleaner") |
| 4. |
Remove the engine room under cover. (Refer to Engine and transmission Assembly - "Engine Room Under Cover") |
| 5. |
Drain the engine coolant. (Refer to Cooling System - "Coolant") |
| 6. |
Remove the drive belt. (Refer to Drive Belt System - "Drive Belt") |
| 7. |
Remove the drive belt idler. (Refer to Drive Belt System - "Idler") |
| 8. |
Remove the alternator and alternator bracket. (Refer to Engine Electrical System - "Alternator") |
| 9. |
Remove the crankshaft damper pulley. (Refer to Drive Belt System - "Crankshaft Damper Pulley") |
| 10. |
Remove the water pump. (Refer to Cooling System - "Water Pump") |
| 11. |
Remove the high pressure fuel pump. (Refer to Engine Control / Fuel System - "High Pressure Fuel Pump") |
| 12. |
Remove the cylinder head cover. (Refer to Cylinder Head Assembly - "Cylinder Head Cover") |
| 13. |
Install the jack to the edge of oil pan to support the engine.
|
| 14. |
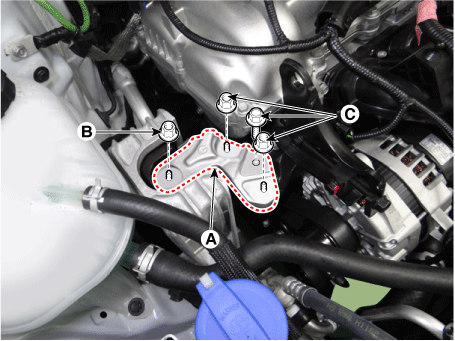
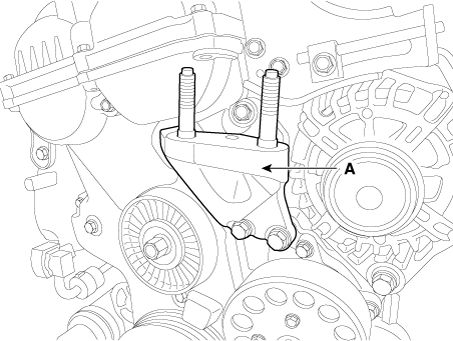
14.Remove the engine mounting support bracket (A).
|
| 15. |
Remove the engine support bracket (A).
|
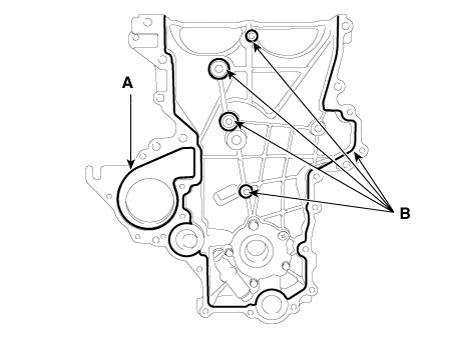
| 16. |
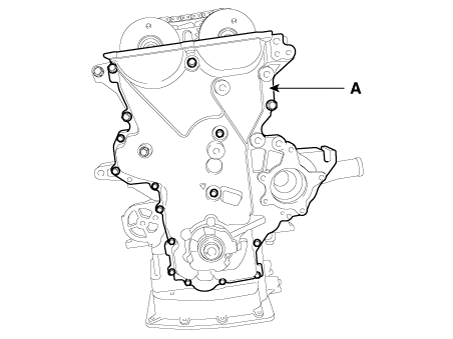
Remove the timing chain cover (A).
|
| Installation |
| 1. |
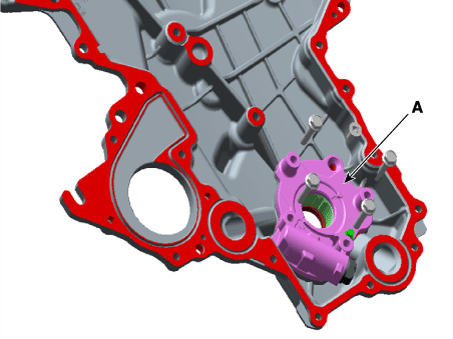
Install the timing chain cover.
|
| 2. |
Install the other parts in the reverse order of removal. |
 Front Oil Seal
Components and components location
Components
1. Front oil seal
Repair procedures
Replacement
1.
Remove the crankshaft damper pu ...
 Timing Chain
Components and components location
Components
1.
Timing chain
2. Timing chain guide
3.
Timing chain arm
4. Timing chain auto ...
Other information:
Kia Forte 2019-2025 (BD) Service Manual: AVN Antenna
Components and components location Components 1. AVN head unit 2. Glass antenna 3. Roof antenna 4. Antenna feeder cable Repair procedures Inspection Glass Antenna Glass Antenna Circuit Inspection 1. Rem ...
Kia Forte 2019-2025 (BD) Service Manual: Seat Heater Switch
Components and components location Components Location Driver / Passenger Seat 1. Driver seat heater switch 2. Passenger seat heater switch Rear Seat 1. Rear seat heater switch Description and operation ...
