Kia Forte: Brake System / Stop Lamp Switch
Components and components location
| Components |
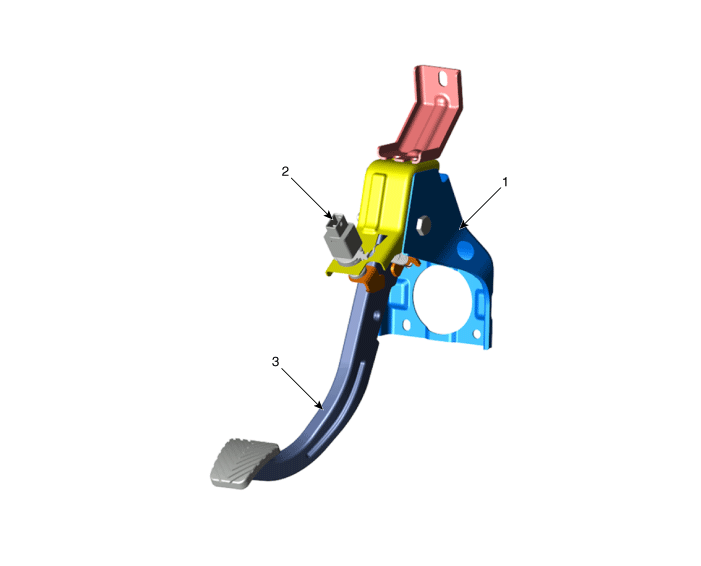
| 1. Brake pedal member assembly
2. Stop lamp switch |
3. Brake pedal arm |
Description and operation
| Operation |
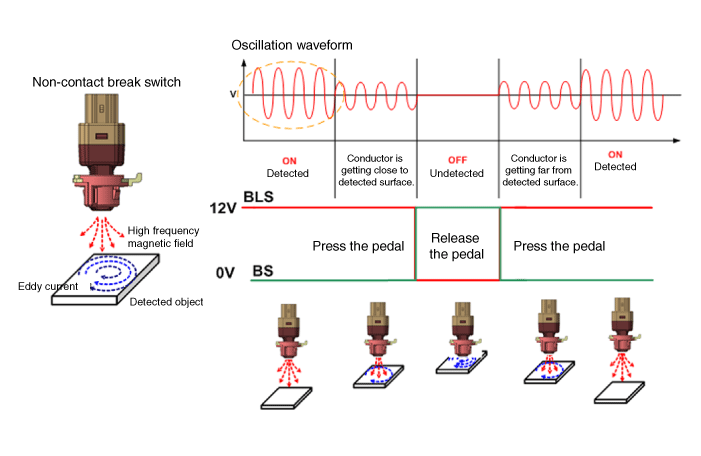
Operation principle of inductive non-contact switch
| 1. |
Use the high frequency magnetic field and the induced current that are generated by oscillation (to approved voltage) of coil in switch. |
| 2. |
The eddy current is generated on surface of metal by self inductance effect if there is metal in high frequency magnetic field. |
| 3. |
The eddy current that is generated attenuates the high frequency magnetic field as much as amount of generated by disturbing the switch's magnetic flux. |
| 4. |
ON-OFF by judging whether high voltage magnetic field is attenuates or not(calculate the voltage difference by length between metal and coil) |
Schematic diagrams
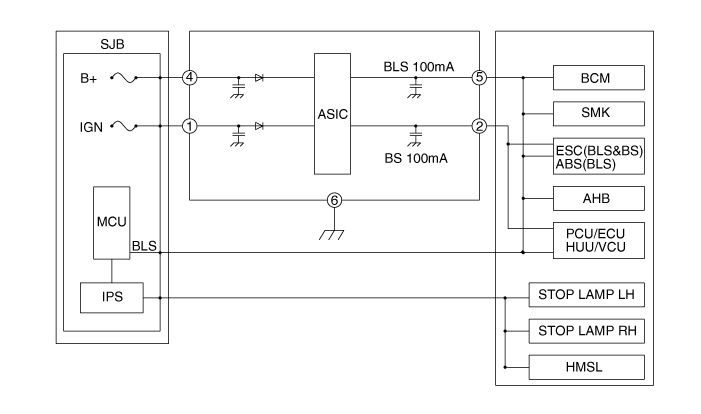
| System circuit diagram |
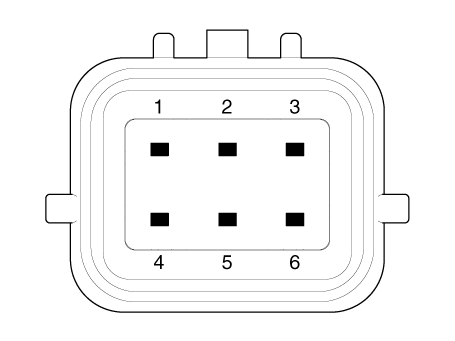
| Terminal function |
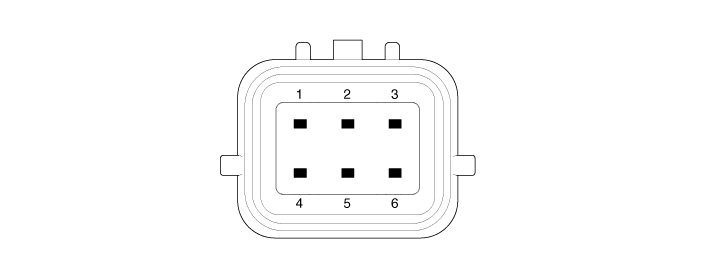
|
Pin No |
Description |
|
1 |
IGN1 |
|
2 |
Brake signal |
|
3 |
- |
|
4 |
B+ |
|
5 |
Stop lamp signal |
|
6 |
Ground |
Troubleshooting
| Troubleshooting |
| 1. |
Part diagnosis
|
| 2. |
Symptom diagnosis
|
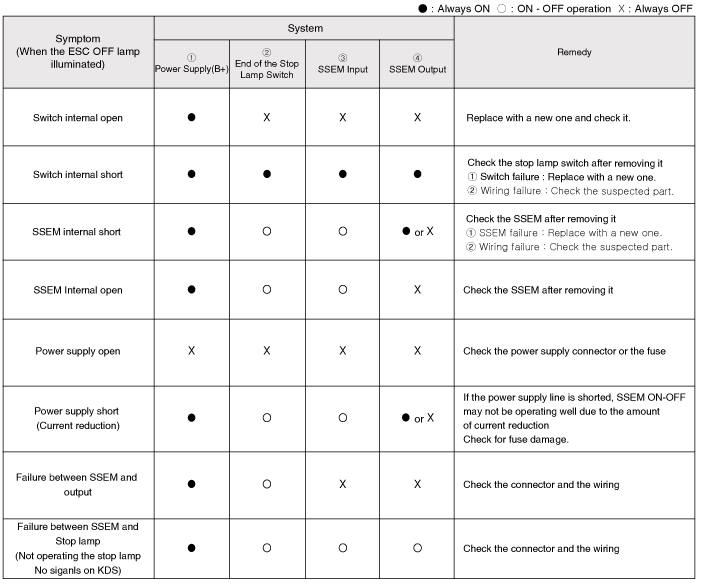
| 3. |
Stop lamp switch system diagnosis
SSEM : Stop Signal Electronic Module |
| 4. |
Refer to DTC guide when the related DTC codes are displayed. |
Repair procedures
| Adjustment |
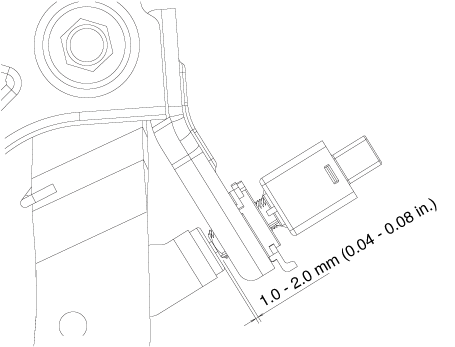
| 1. |
Confirm the gap between stop lamp switch and bracket.
|
| 2. |
If the gap between stop lamp switch and bracket is not between 1.0 - 2.0 mm (0.04 - 0.08 in), check the mounting clip and other parts around the stop lamp. |
| 3. |
If everything is normal, reinstall the stop lamp switch and check the clearance again. |
| Inspection |
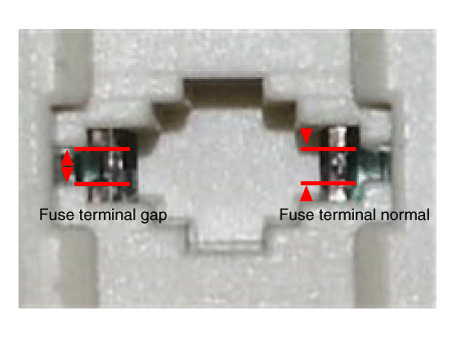
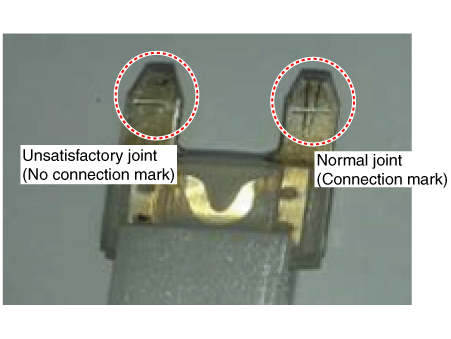
1. Fuse inspection
Mount the test fuse to the switch fuse and relay fuse part to confirm a normal joint fit.
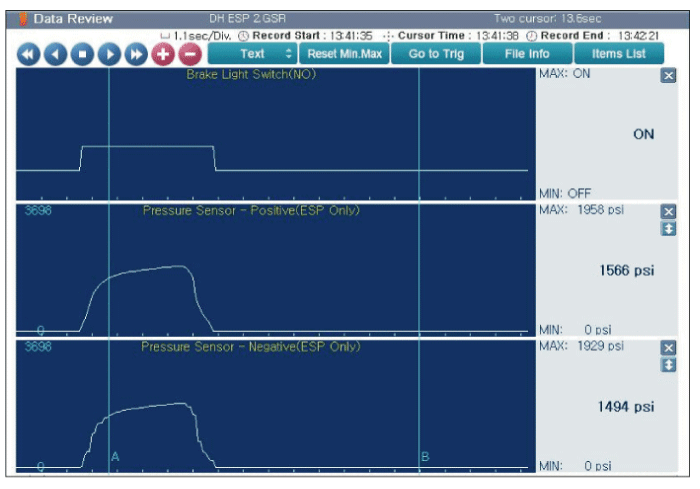
2. KDS Data Analysis
| 1. |
Analyze KDS data and check for any abnormality with the stop lamp switch.
|
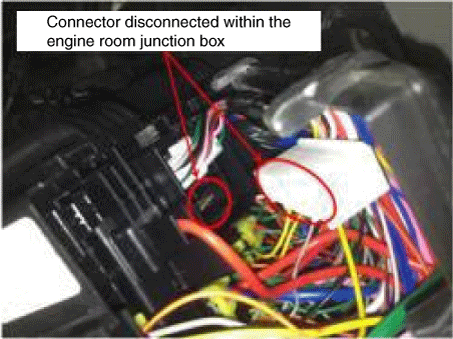
3. Inspection of connector by each part
Check for damage, terminal surge or incomplete connection in each connector.
[Engine room junction box]
[ABS/VDC control module]

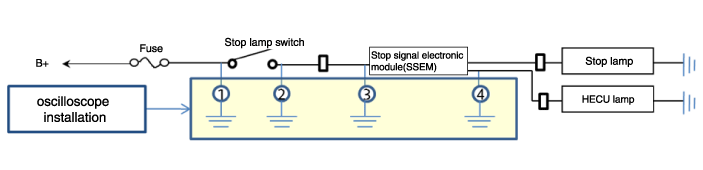
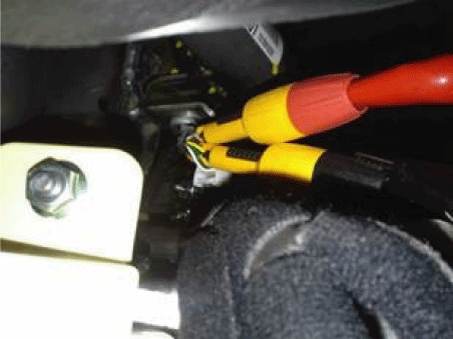
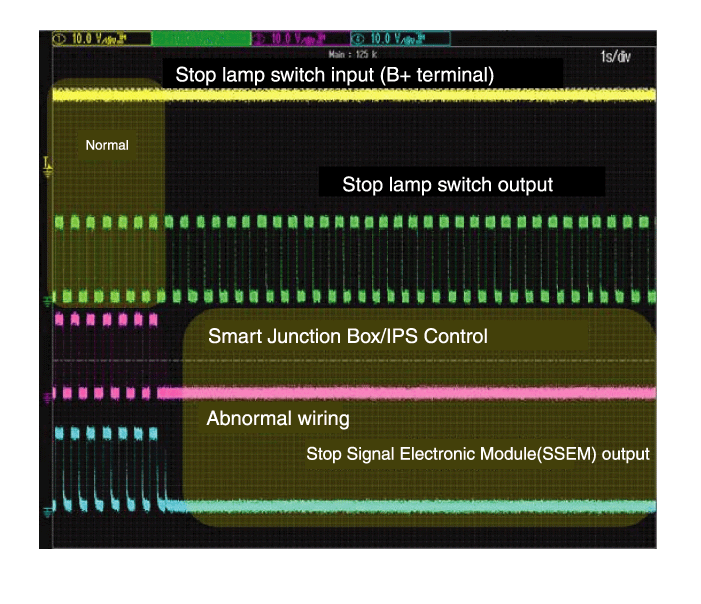
4. Inspect the stop lamp circuit
Connect probe to each terminal wire and confirm oscilloscope waveform.
[Stop lamp switch input/output]
[Oscilloscope waveform screen]
| Replacement |
| 1. |
Switch "OFF" ignition and disconnect the negative (-) battery terminal. |
| 2. |
Remove the crash pad lower panel. (Refer to Body (Interior and Exterior) - "Crash Pad Lower Panel") |
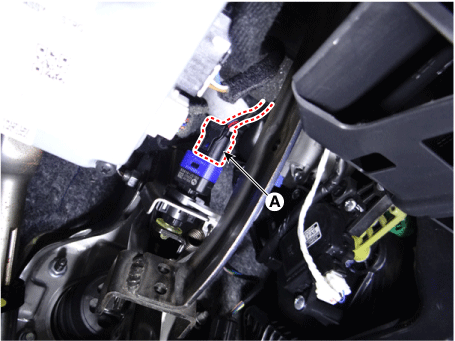
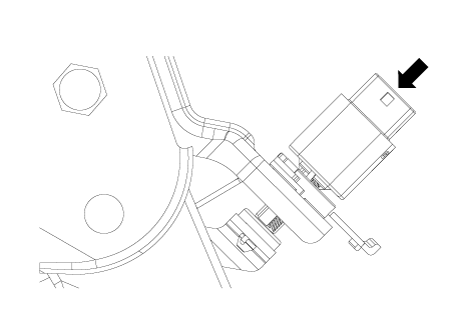
| 3. |
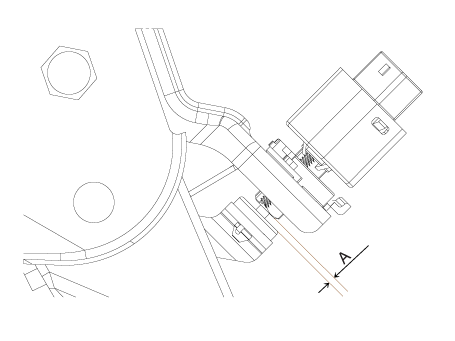
Disconnect the stop lamp switch connector (A).
|
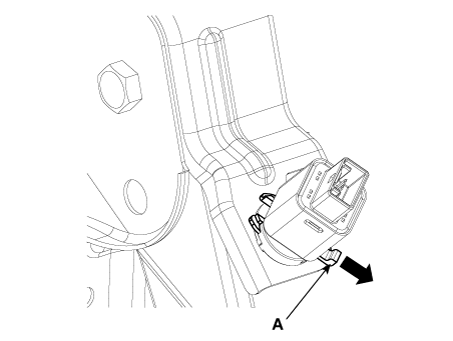
| 4. |
Pull the locking plate (A) as indicated by the arrow.
|
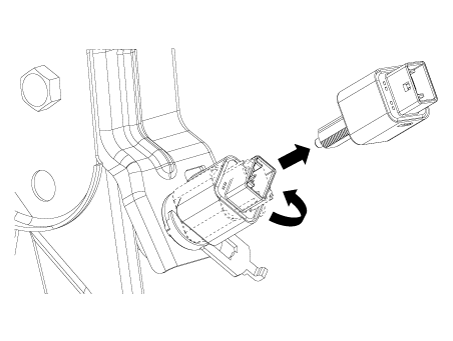
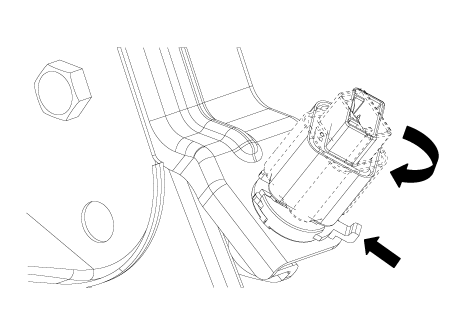
| 5. |
Turn brake switch 45° counterclockwise and remove it.
|
| 6. |
Inspect a removed stop lamp switch along the below procedures.
|
| 7. |
Fix the brake pedal arm and insert fully the brake switch so that the contact part is invisible.
|
| 8. |
After inserting, turn the brake switch 45° clockwise, and then assemble locking plate by pushing.
|
| 9. |
Confirm the gap between stop lamp switch and bracket.
|

| 10. |
Connect the stop lamp switch connector (A).
|
| 11. |
Install the other parts in the reverse order of removal. |
 Rear Drum Brake
Components and components location
Components
1. Shoe hold down pin
2. Shoe adjuster
3. Upper return spring
4. Adjusting lever
5. Shoe
6. Adjusting s ...
 Parking Brake System
Components and components location
Components
1. Parking brake lever assembly
2. Parking brake front cable
3. Parking brake cable [LH]
4. Parking brake ...
Other information:
Kia Forte 2019-2025 (BD) Service Manual: Cylinder Head Assembly
Components and components location Components 1. Cylinder head cover 2. Cylinder head cover gasket 3. Cylinder head assembly 4. Cylinder head gasket 5. Camshaft bearing cap 6. Camshaft front bearing cap 7. O-ring 8. Exhaust OCV (Oil Contr ...
Kia Forte 2019-2025 (BD) Service Manual: Charging System
Components and components location Components ① ECM ② Battery ③ Alternator ④ Starter ⑤ Instrument Cluster ⑥ Ignition switch or start/stop button ⑦ Battery sensor ⑧ Hood switch Description and operation Description The charging system in ...
