Kia Forte: Fuel Delivery System / Fuel Line
Repair procedures
| Removal |
Low Pressure Fuel Line [High Pressure Fuel Pump ↔ Fuel Tank]
| 1. |
Release the residual pressure in fuel line. (Refer to the Fuel Delivery System - "Release Residual Pressure in Fuel Line") |
| 2. |
Turn the ignition switch OFF and disconnect the battery negative (-) terminal. |
| 3. |
Remove the air cleaner. (Refer to Engine Mechanical System - "Air Cleaner") |
| 4. |
Remove the battery. (Refer to Engine Electrical System - "Battery") |
| 5. |
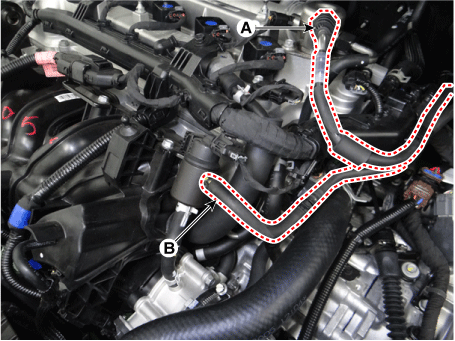
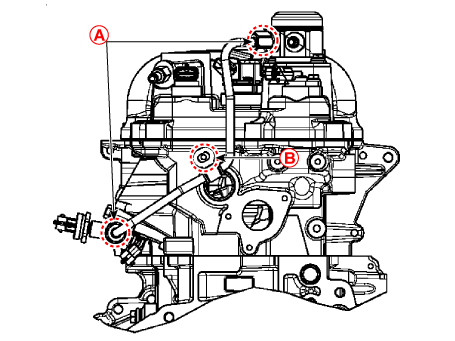
Disconnect the low pressure fuel line quick-connector (A). |
| 6. |
Disconnect the vapor hose (B).
|


| 7. |
Remove the fuel tank. (Fuel Delivery System - "Fuel Tank") |
| 8. |
Remove the front sub frame. (Refer to Suspension System - "Sub Frame") |
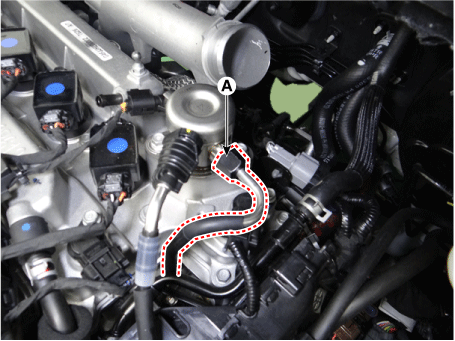
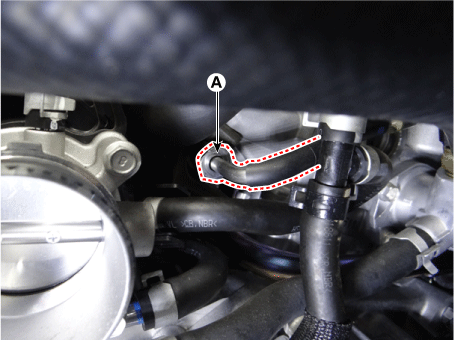
| 9. |
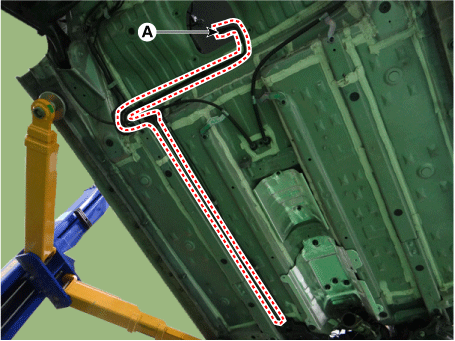
Remove the fuel line (A) after loosening the mounting bolts and bracket.
|
High Pressure Fuel Line [High Pressure Fuel Pump ↔ Delivery Pipe]
| 1. |
Release the residual pressure in fuel line. (Refer to the Fuel Delivery System - "Release Residual Pressure in Fuel Line") |
| 2. |
Turn the ignition switch OFF and disconnect the battery negative (-) terminal. |
| 3. |
Remove the air cleaner. (Refer to Engine Mechanical System - "Air Cleaner") |
| 4. |
Remove the battery. (Refer to Engine Electrical System - "Battery") |
| 5. |
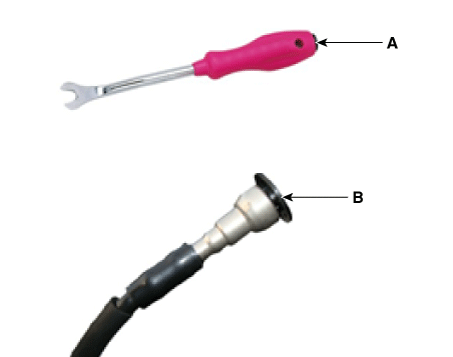
Remove the installation high pressure fuel pipe flange nut (A) from the high pressure fuel pump with the special service tool [SST No. 09314 - 3Q100 or 09314 - 27130].
|
| 6. |
Remove the installation high pressure fuel pipe flange nut (A) from the delivery pipe with the special service tool [SST No. 09314 - 3Q100 or 09314 - 27130].
|
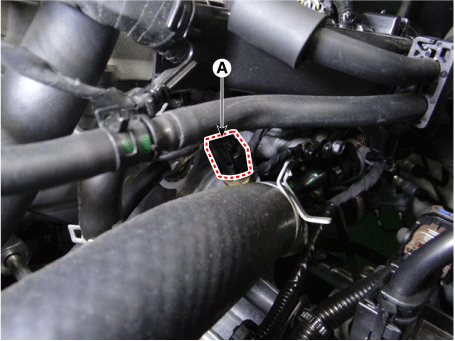
| 7. |
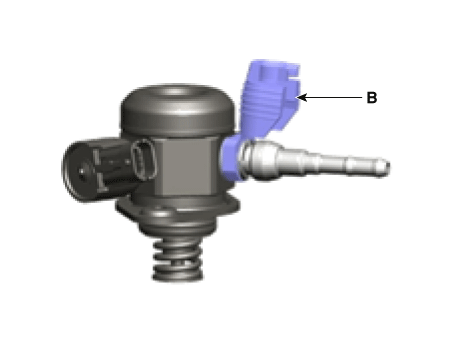
Disconnect the engine coolant temperature sensor connector (A).
|
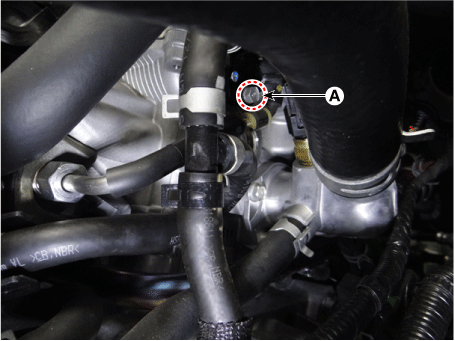
| 8. |
Remove the High pressure fuel pipe function block mounting bolt (A).
|
| 9. |
Remove the high pressure fuel pipe. |
| Installation |
| 1. |
Install the fuel line in the reverse order of removal. |
| 2. |
Install the high-pressure fuel pipe as follows.
|
 Fuel Pressure Regulator
Repair procedures
Removal and Installation
1.
Remove the fuel pump.
(Refer to Fuel Delivery System - “Fuel Pump”)
2.
Remove the fuel sender. ...
 Filler-Neck Assembly
Repair procedures
Removal and Installation
1.
Open the fuel filler door.
2.
Turn ignition switch OFF and disconnect the battery negative (-) term ...
Other information:
Kia Forte 2019-2025 (BD) Service Manual: Integrated Memory Seat (IMS) Unit
Components and components location Components Location 1. Memory power seat unit 2. Driver seat Schematic diagrams Connector and Terminal function No. Connector A Connector B Connector ...
Kia Forte 2019-2025 (BD) Owners Manual: Tire sidewall labeling
This information identifies and describes the fundamental characteristics of the tire and also provides the tire identification number (TIN) for safety standard certification. The TIN can be used to identify the tire in case of a recall. 1. Manufacturer or brand name Manufacturer or ...
