Kia Forte: Motor Driven Power Steering / Steering Column and Shaft
Repair procedures
| Removal and Installation |
| 1. |
Disconnect the battery negative terminal. |
| 2. |
Turn the steering wheel so that the front wheels are facing straight ahead. |
| 3. |
Remove the driver airbag module. (Refer to Restraint - "Driver Airbag (DAB) Module and Clock Spring") |
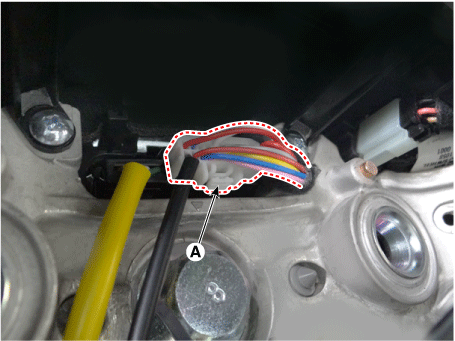
| 4. |
Disconnect the steering wheel connector (A).
|
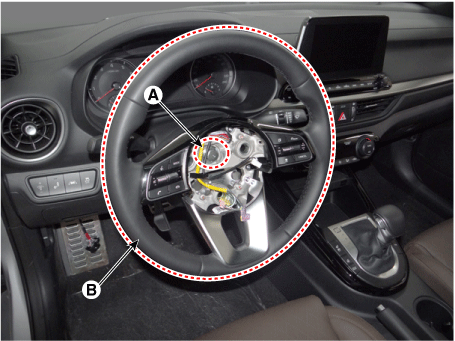
| 5. |
Loosen the bolt (A) and then remove the steering wheel (B).
|

| 6. |
Remove the steering column shroud panel. (Refer to Body - "Steering Column Shroud Panel") |
| 7. |
Remove the clock spring. (Refer to Restraint - "Driver Airbag (DAB) Module and Clock Spring") |
| 8. |
Remove the multifunction switch assembly. (Refer to Body Electrical System - "Multifunction Switch") |
| 9. |
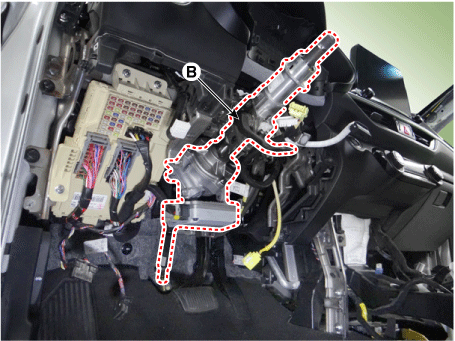
Remove the crash pad lower panel. (Refer to Body - "Crash pad lower panel") |
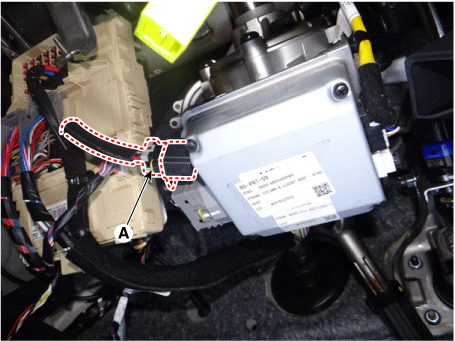
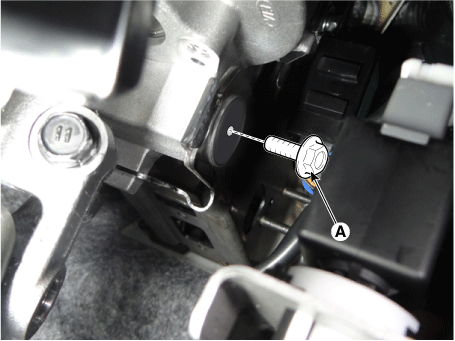
| 10. |
Disconnect the MDPS connector (A).
|
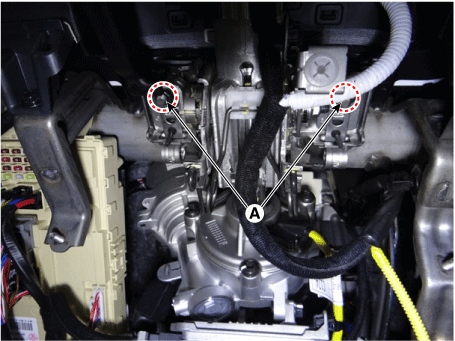
| 11. |
Disconnect all connectors connected to the steering column. |
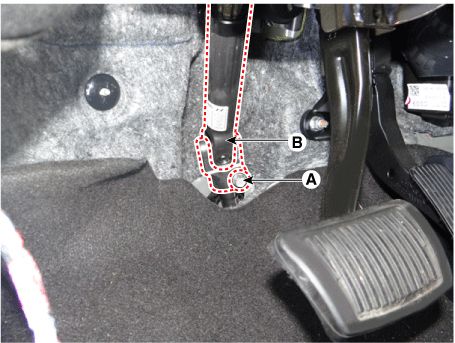
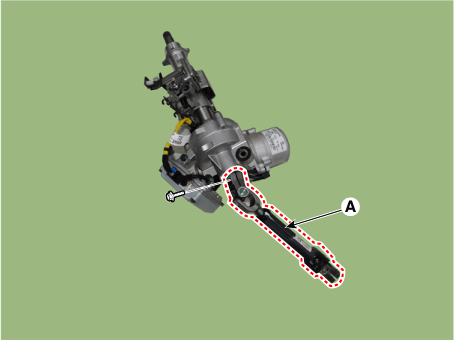
| 12. |
Loosen the bolt (A) and then remove the universal joint (B).
|
| 13. |
Loosen the steering column lower mounting bolt (A).
|
| 14. |
Loosen the steering column upper mounting nuts (A) and then remove the steering column & shaft (B).
|
| 15. |
Install in the reverse order of removal. |
| 16. |
Perform the "Steering Angle Sensor (SAS) Calibration" and "EPS Type Recognition". |
| Disassembly |
Universal joint assembly
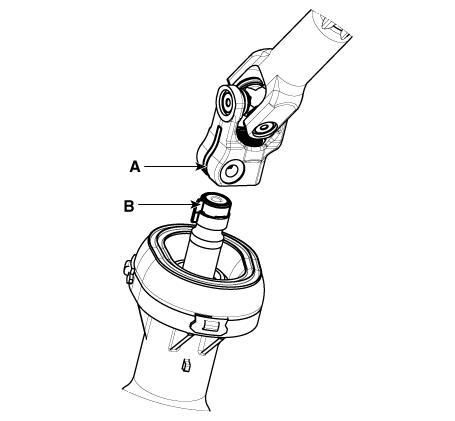
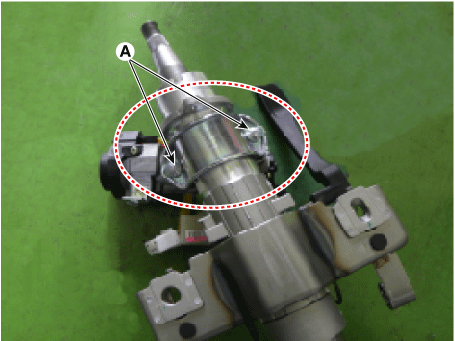
| 1. |
Loosen the bolt and then remove the universal joint assembly (A).
|
| 2. |
Assemble in the reverse order of disassembly. |
Key lock assembly
| 1. |
Make a groove on the head of special bolts (A) by a punch.
|
| 2. |
Loosen the special bolt using a screw driver and then remove the key lock assembly from the steering column assembly. |
| 3. |
Reassembly is the reverse of the disassembly. |
| Inspection |
| 1. |
Check the steering column for damage and deformation. |
| 2. |
Check the joint bearing for damage and wear. |
| 3. |
Check the tilt bracket for damage and cracks. |
| Diagnosis with KDS |
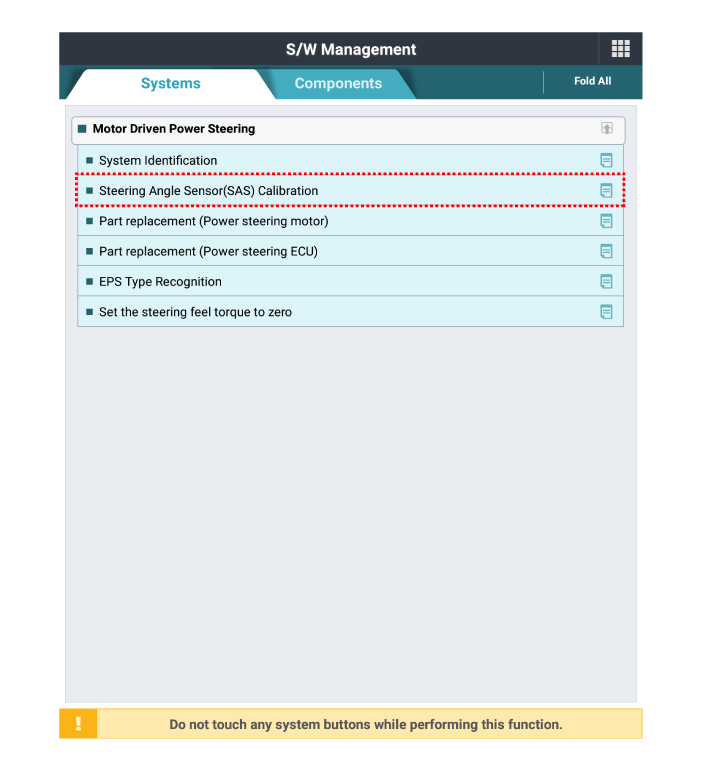
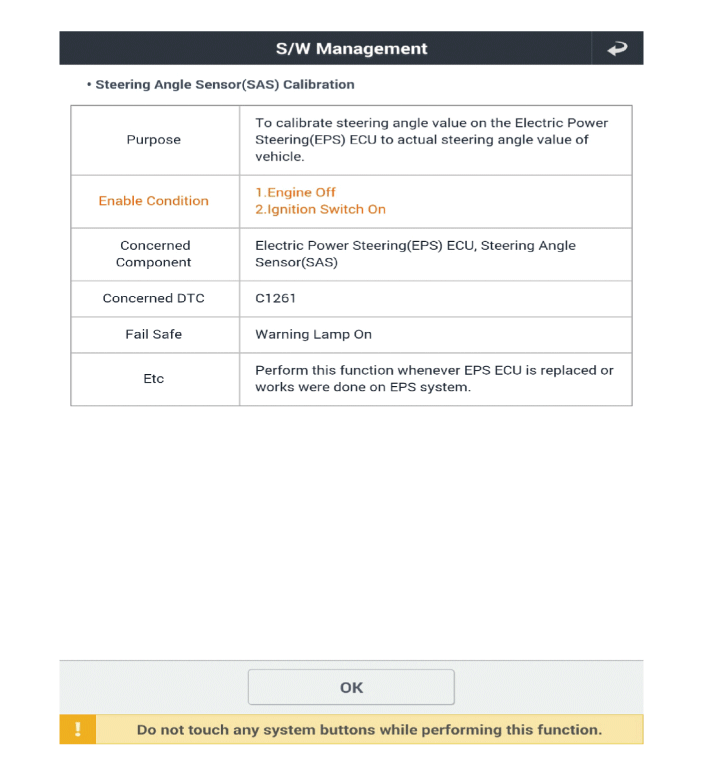
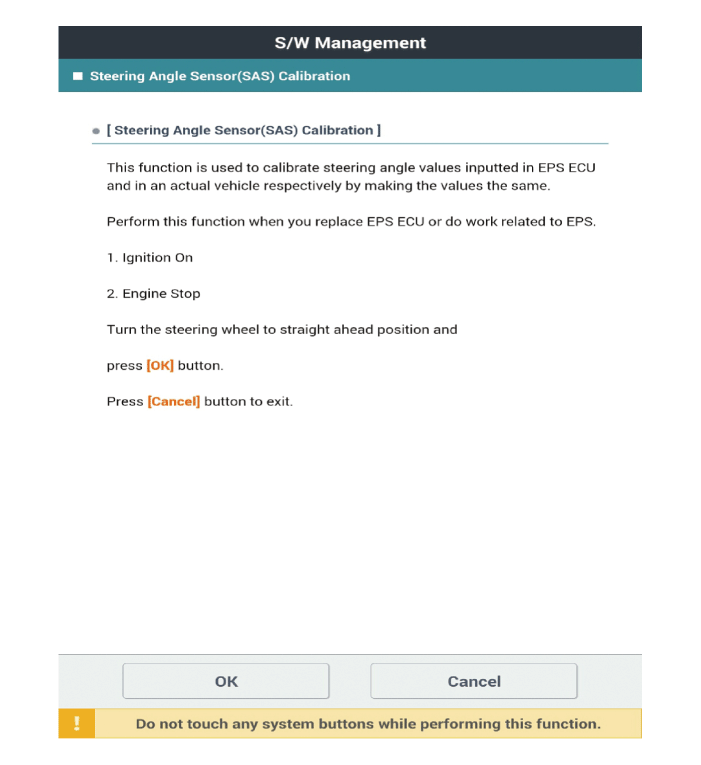
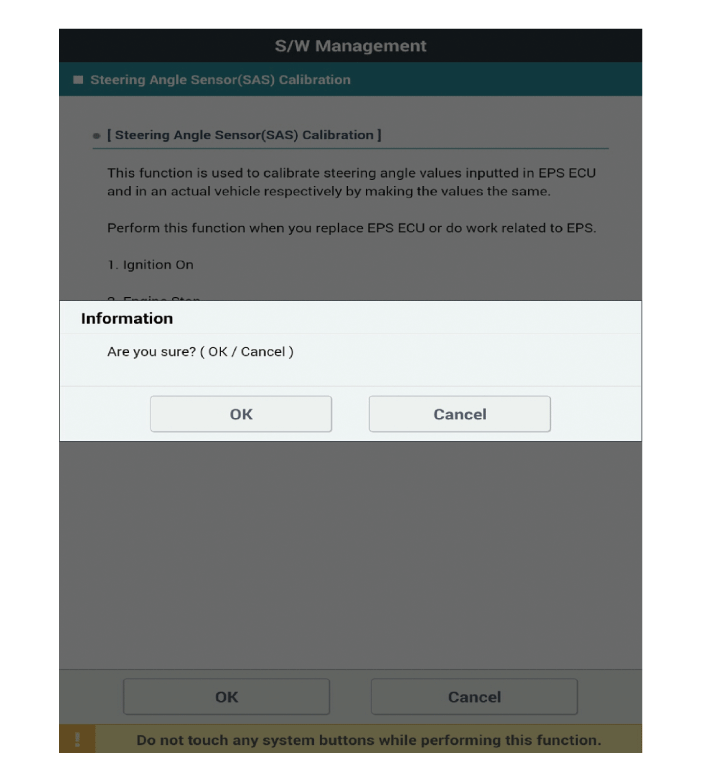
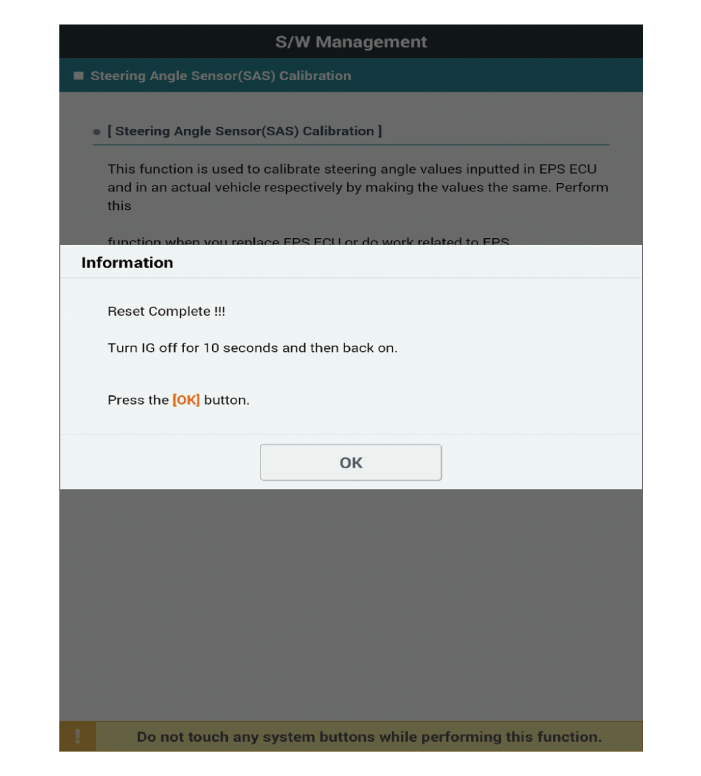
Steering Angle Sensor (SAS) Calibration
|
| 1. |
Connect self-diagnosis connector (16pins) located under the driver side crash pad to self-diagnosis device, and then turn the self-diagnosis device after key is ON. |
| 2. |
Select the "vehicle model" and "Motor Driven Power Steering" on KDS vehicle selection screen. |
| 3. |
Select the "Steering Angle Sensor (SAS) Calibration" on KDS screen, then select OK. |
| 4. |
Proceed with the test according to the screen instructions.
|
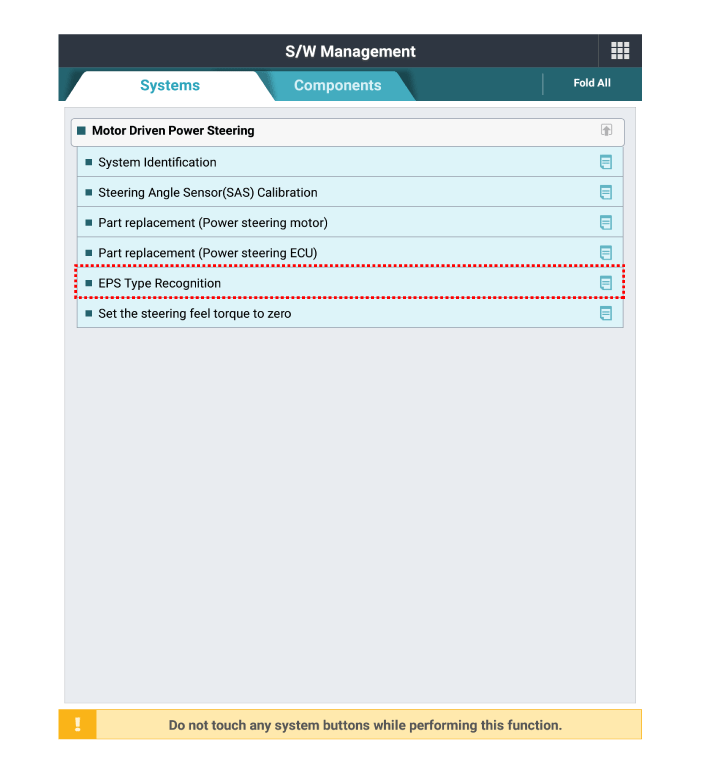
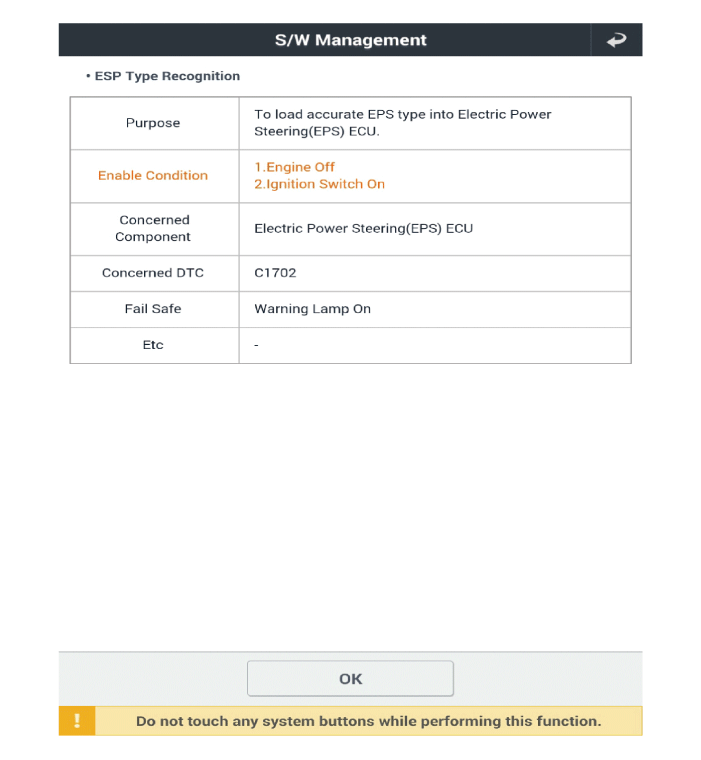
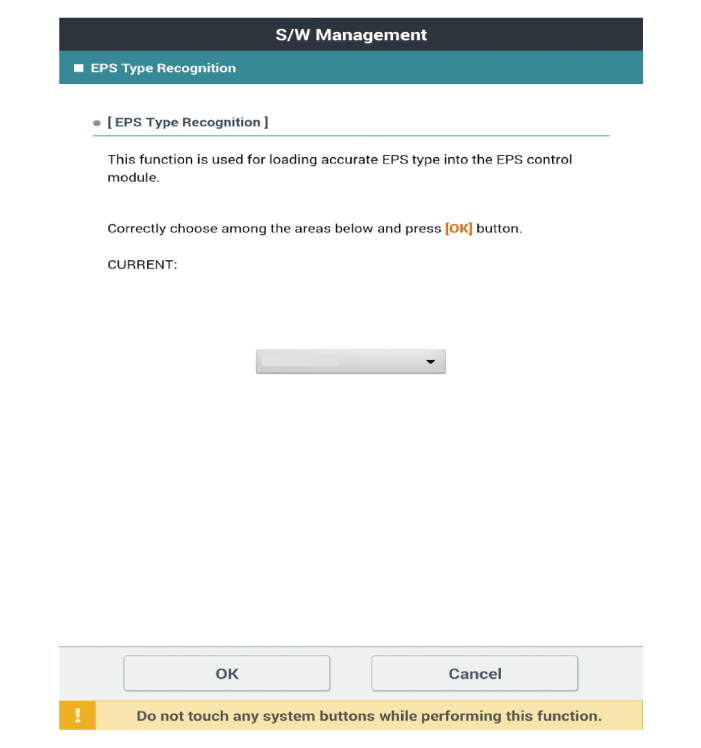
EPS Type Recognition
|
| 1. |
Connect self-diagnosis connector (16pins) located under the driver side crash pad to self-diagnosis device, and then turn the self-diagnosis device after key is ON. |
| 2. |
Select the "vehicle model" and "Motor Driven Power Steering" on KDS vehicle selection screen. |
| 3. |
Select the "EPS Type Recognition" on KDS screen, then select OK. |
| 4. |
Proceed with the test according to the screen instructions.
|
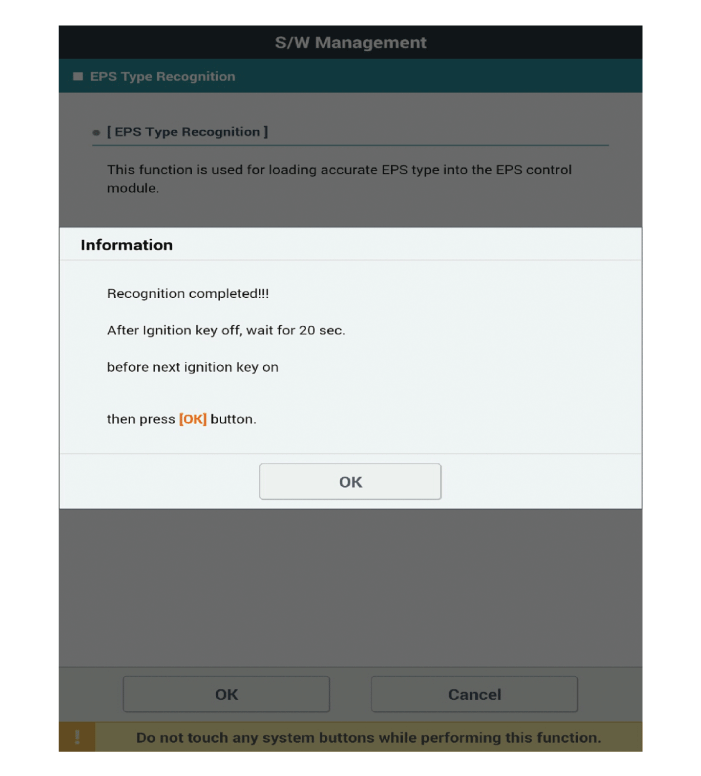
| 5. |
Remove the DTC. |
| 6. |
Turn off the IG switch and wait for 10 seconds or more before starting the engine. And then make sure that MDPS works properly. |
 MDPS Column and Housing
Repair procedures
Removal
1.
Remove the steering column and shaft assembly.
(Refer to Motor Driven Power Steering - "Steering Column and Shaft")
...
 Steering Gear Box
Components and components location
Components
1. Sub
frame
2. Steering gear box
3. Heat
protector
Repair procedures
Removal and Inst ...
Other information:
Kia Forte 2019-2025 (BD) Service Manual: Rheostat
Schematic diagrams Connector and Terminal Function Repair procedures Removal 1. Disconnect the negative (-) battery terminal. 2. Remove the crash pad lower panel. (Refer to Body - "Crash Pad Lower Panel") ...
Kia Forte 2019-2025 (BD) Owners Manual: Fuel Economy
■ Type A ■ Type B Average Fuel Economy (1) The average fuel economy is calculated by the total driving distance and fuel consumption since the last average fuel economy reset. - Fuel economy range: 0 ~ 99.9 km/L, L/100 km or MPG The average fuel economy can be reset ...
