Kia Forte: Brake System / Rear Disc Brake
Components and components location
| Components |
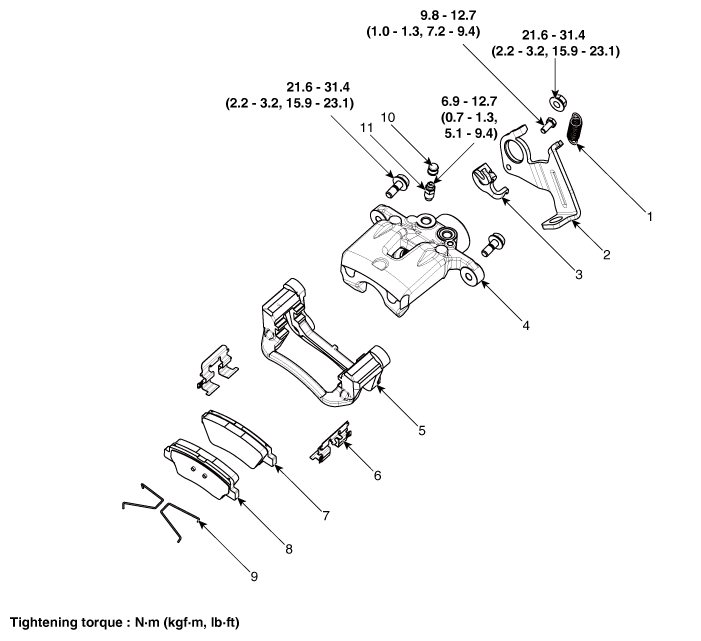
| 1. Lever spring 2. Cable guide 3. Lever 4. Caliper body 5. Caliper carrier 6. Pad liner |
7. Brake pad [In] 8. Brake pad [Out] 9. Return spring 10. Bleed screw cap 11. Bleed screw |
Repair procedures
| Removal |
| 1. |
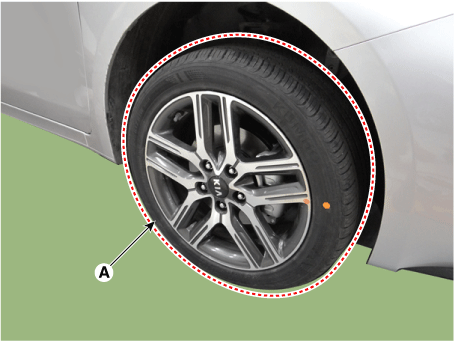
Remove the rear wheel and tire (A).
|
| 2. |
Release the parking brake lever and parking brake cable is loose. |
| 3. |
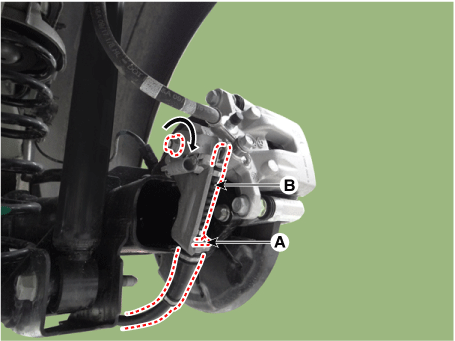
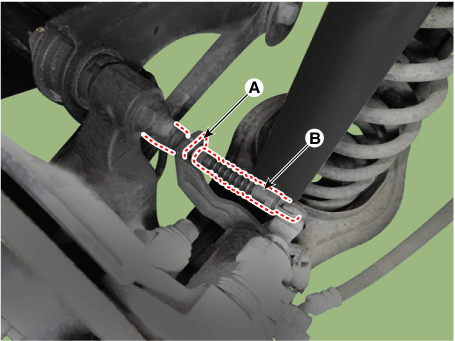
Remove the parking brake cable (B), after removing the clip (A). [Couple torsion beam axle type]
[Multi link type]
|
| 4. |
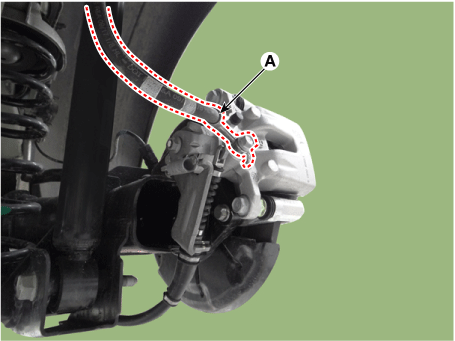
Disconnect the brake hose (A) from the brake caliper by loosening the bolt.
|
| 5. |
Loosen the guide rod bolt (A) and then remove the caliper body (B).
|
| 6. |
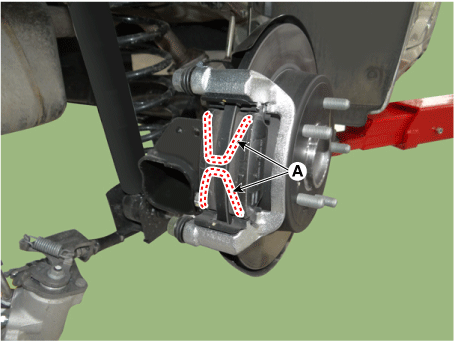
Remove the pad return springs (A).
|
| 7. |
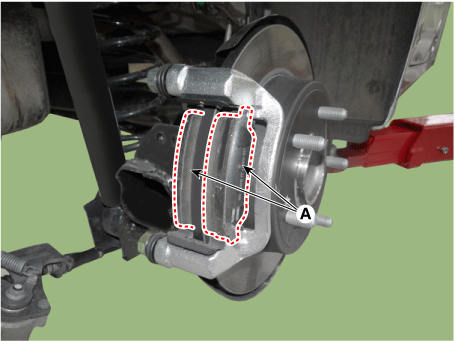
Remove the brake pads (A).
|
| 8. |
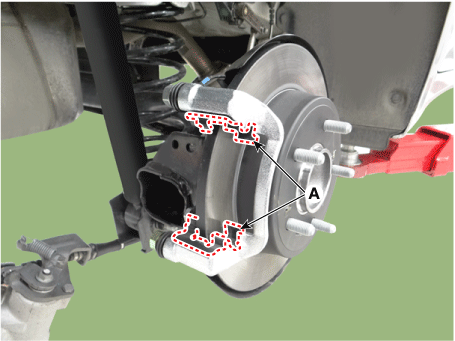
Remove the pad liner (A).
|
| 9. |
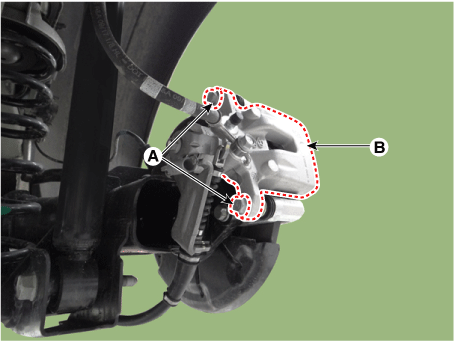
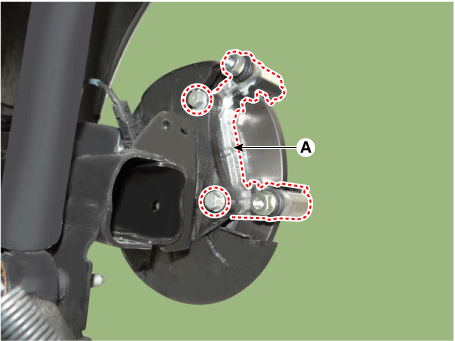
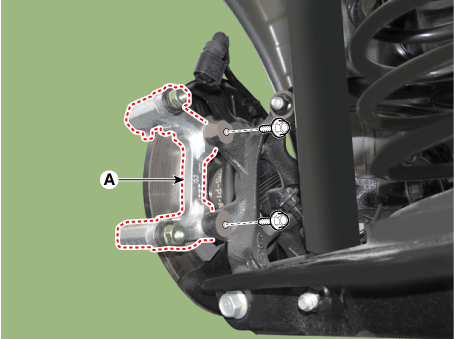
Remove the brake caliper (A) by loosening the bolts. [Couple torsion beam axle type]
[Multi link type]
|
| 10. |
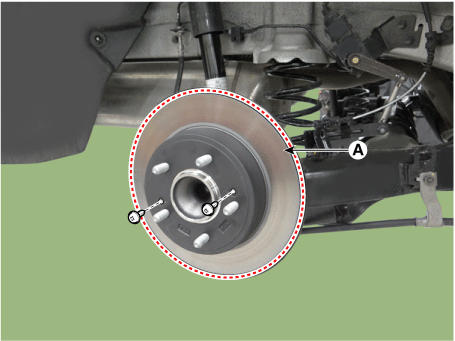
Remove the rear brake disc (A) by loosening the screws.
|
| Replacement |
| 1. |
Remove the rear wheel and tire (A).
|
| 2. |
Release the parking brake lever and parking brake cable is loose. |
| 3. |
Remove the parking brake cable (B), after removing the clip (A). [Couple torsion beam axle type]
[Multi link type]
|
| 4. |
Loosen the guide rod bolts (A) and then hold the caliper body (B) with wire.
|
| 5. |
Remove the pad return springs (A).
|
| 6. |
Remove the brake pads (A).
|
| 7. |
Remove the pad liner (A).
|
| Inspection |
Rear Brake Disc Thickness Check
| 1. |
Check the brake pads for wear and fade. |
| 2. |
Check the brake disc for damage and cracks. |
| 3. |
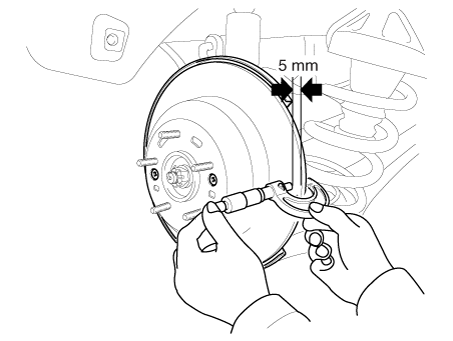
Remove all rust and contamination from the surface, and measure the disc thickness at 8 points, at least, at the same distance apart (5mm) from the brake disc outer circle.
|
| 4. |
If wear exceeds the limit, swab left and right discs and pad assemblies of the vehicle. |
Rear Brake Pad Check
| 1. |
Check the pad wear. Measure the pad thickness and replace it, if it is less than the specified value.
|
| 2. |
Check that grease is applied to sliding contact points and check the pad and backing metal for damage. |
Rear Brake Disc Runout Check
| 1. |
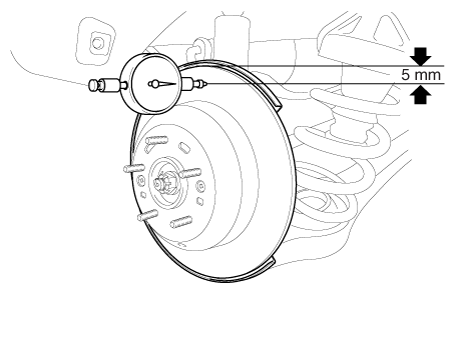
Place a dial gauge about 5mm (0.2 in.) from the outer circumference of the brake disc, and measure the runout of the disc.
|
| 2. |
If the runout of the brake disc exceeds the limit specification, replace the disc, and then measure the runout again. |
| 3. |
If the runout does not exceed the limit specification, install the brake disc after turning it 180° and then check the brake disc again for runout. |
| 4. |
If the runout cannot be corrected by changing the position of the brake disc, replace the brake disc. |
| Installation |
| 1. |
Install in the reverse order of removal. |
| 2. |
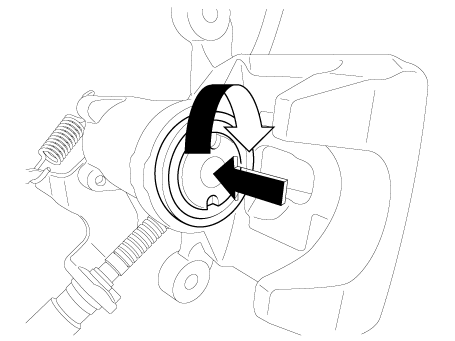
Rotate the caliper piston and push the direction of the arrow.
|
| 3. |
After installation, bleed the brake system. (Refer to Brake system - "Brake Bleeding Prcoedures")
|
 Front Disc Brake
Components and components location
Components
1. Caliper body
2. Caliper carrier
3. Brake pad [In]
4. Brake pad [Out]
5. Return spring
6. Pad liner
...
 Rear Drum Brake
Components and components location
Components
1. Shoe hold down pin
2. Shoe adjuster
3. Upper return spring
4. Adjusting lever
5. Shoe
6. Adjusting s ...
Other information:
Kia Forte 2019-2025 (BD) Service Manual: Fuel Filler Cap
Description and operation Description A ratchet tightening device on the threaded fuel filler cap reduces the chances of incorrect installation, which seals the fuel filler. After the gasket on the fuel filler cap and the filler neck flange contact each other, the ratchet produces ...
Kia Forte 2019-2025 (BD) Service Manual: Front Suspension System
Components and components location Components 1. Strut assembly 2. Steering gear box 3. Lower arm 4. Sub frame 5. Sub frame stay 6. Stabilizer bar ...

