Kia Forte: Parking Brake System / Parking Brake Cable
Repair procedures
| Removal and Installation |
Disc Brake Type
The parking brake cables must not be bent or distorted. This will lead to stiff operation and premature failure. |

| 1. |
Disconnect the battery negative terminal. |
| 2. |
Remove the floor console. (Refer to Body - "Floor Console Assembly") |
| 3. |
Disconnect the smart key antenna connector (A).
|
| 4. |
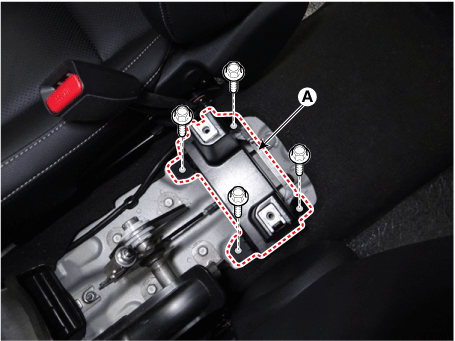
Remove the floor console rear mounting bracket (A).
|
| 5. |
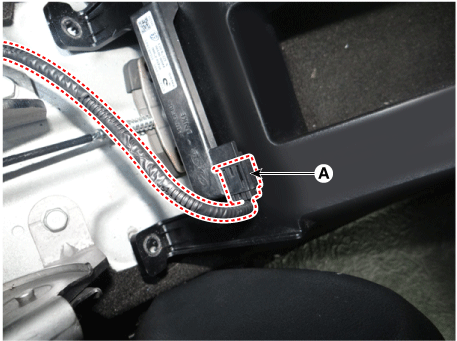
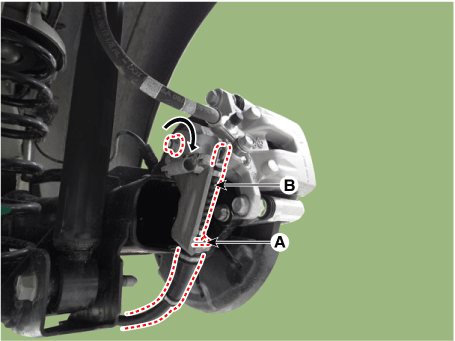
Remove the cable retainer (A) and then disconnect the parking brake cables (B).
|
| 6. |
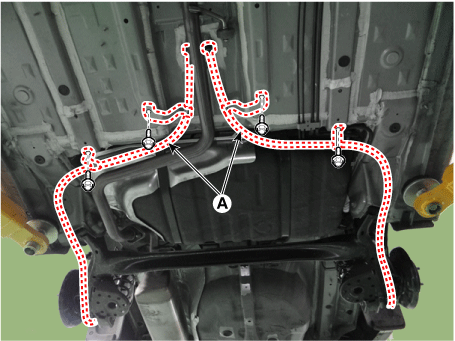
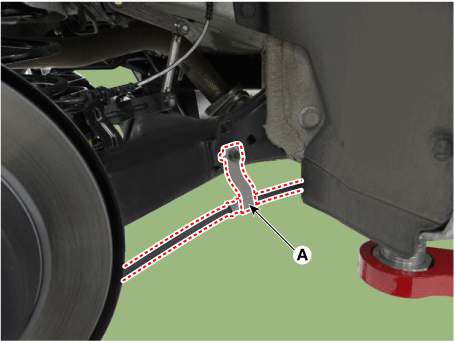
Disconnect the parking brake cable (A) by loosening the bolts.
|
| 7. |
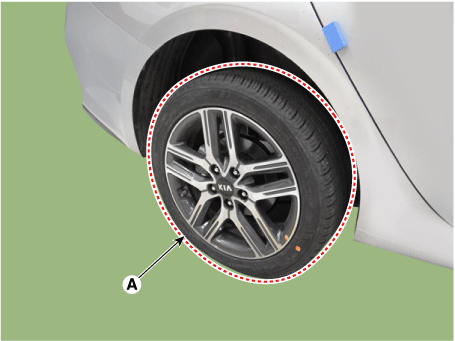
Remove the rear wheel and tire (A).
|
| 8. |
Disconnect the parking brake cable (A) by loosening the bolts.
|

| 9. |
Release the parking brake lever and parking brake cable is loose. |
| 10. |
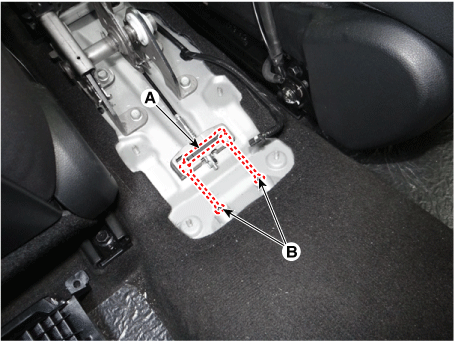
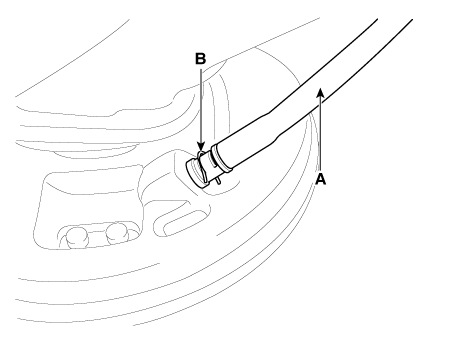
Remove the parking brake cable (B), after removing the clip (A).
|
| 11. |
Install in the reverse order of removal. |
Drum Brake Type
The parking brake cables must not be bent or distorted. This will lead to stiff operation and premature failure. |
| 1. |
Disconnect the battery negative terminal. |
| 2. |
Remove the floor console. (Refer to Body - "Floor Console Assembly") |
| 3. |
Disconnect the smart key antenna connector (A).
|
| 4. |
Remove the floor console rear mounting bracket (A).
|
| 5. |
Remove the cable retainer (A) and then disconnect the parking brake cables (B).
|
| 6. |
Disconnect the parking brake cable (A) by loosening the bolts.
|
| 7. |
Remove the rear wheel and tire (A).
|
| 8. |
Disconnect the parking brake cable (A) by loosening the bolts.
|
| 9. |
Remove the parking brake cable from the brake shoe. (Refer to Brake System - "Rear Drum Brake") |
| 10. |
Remove the parking brake cable (A), after removing the clip (B).
|
| 11. |
Install in the reverse order of removal. |
| Adjustment |
Disc Brake Type
Re-setting of the parking brake is necessary after overhauling the caliper body, or if the brake calipers, housing, parking brake cable or brake discs have been changed. |
| 1. |
Remove the floor console to reach the adjusting nut. |
| 2. |
Loosen the parking brake cable until both operating levers rest in fully off position. |
| 3. |
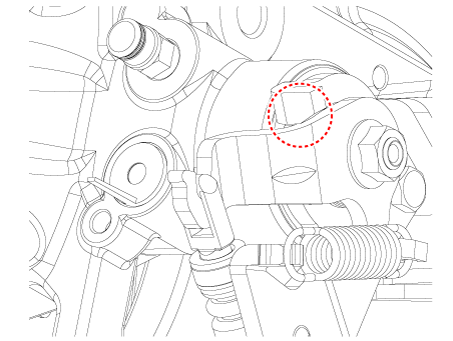
Bring the brake pads in their operating position by pressing the brake pedal down several times until there is resistance. |
| 4. |
Tension the parking brake cable by tightening the adjusting nut, until the operating levers on both calipers lift from the stop, up to a distance of (A) between operating lever (B) and stopper (C).
|
| 5. |
Parking brake lever in the car must be in fully loosened position. |
| 6. |
If the handbrake cables where changed, actuate the parking brake a few times with maximum force to stretch the parking brake cables, and then control adjusting as above. |
| 7. |
Check the wheels of their free operation. |
| 8. |
Install the floor console. (Refer to Body - "Floor Console Assembly") |
Drum Brake Type
| 1. |
Depress the brake pedal several times to set the self-adjusting brake.
|
 Parking Brake Lever
Repair procedures
Removal and Installation
The parking brake cables must not be bent or distorted. This will lead
...
 ABS(Anti-Lock Brake System)
Components and components location
Components
1. ABS control module
2. Front wheel speed sensor
3. Rear wheel speed sensor
4. ABS Warning lamp
5. EBD / P ...
Other information:
Kia Forte 2019-2025 (BD) Service Manual: Disc Brakes and Pads
Repair procedures Inspection Check the pads for excessive wear, discs for run out and wear, and calipers for fluid leakage. Front Brake Front brake disc thickness check 1. Check the brake pads for wear and fade. 2. Check the br ...
Kia Forte 2019-2025 (BD) Owners Manual: Resetting the system, System disabled
Resetting the system The last break time is set to 00:00 and the driver's attention level is set to 5 (very attentive) when the driver resets the Driver Attention Warning system. The driver attention warning system resets in the following situations. - The engine is turned ...
