Kia Forte: Body Electrical System / Multifunction Switch
Kia Forte 2019-2025 (BD) Service Manual / Body Electrical System / Multifunction Switch
Specifications
| Specifications |
|
Items |
Specifications |
|
|
Rated voltage |
Front fog lamp switch |
5 V |
|
Rear fog lamp switch |
||
|
Head lamp switch |
||
|
Dimmer & passing |
||
|
Turn signal lamp |
||
|
Wiper |
||
|
Front Washer |
12 V |
|
Components and components location
| Components |
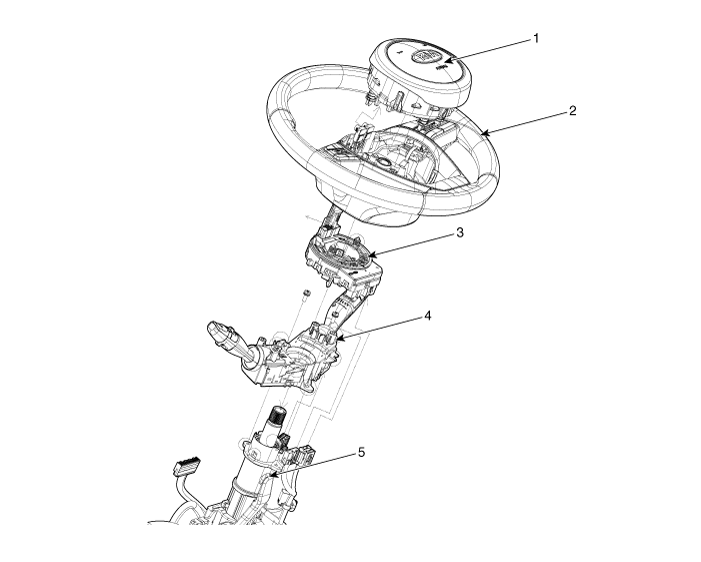
| 1 . Driver airbag module (DAB)
2 . Steering wheel 3 . Clock spring |
4. Multifunction switch 5. Steering Column |
Description and operation
| Description |
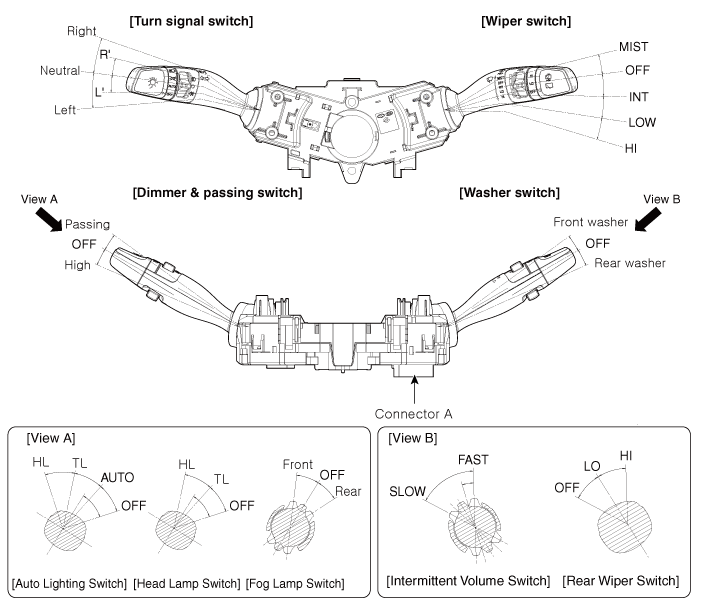
Schematic diagrams
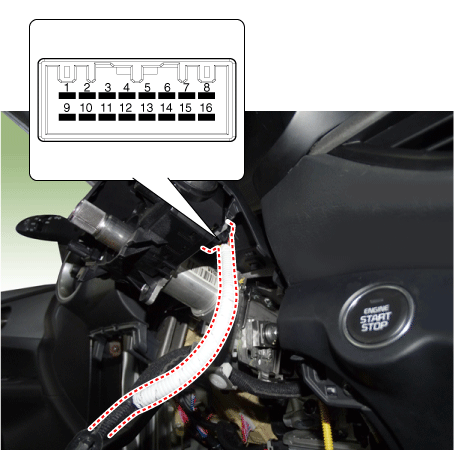
| Connector and Terminal function |

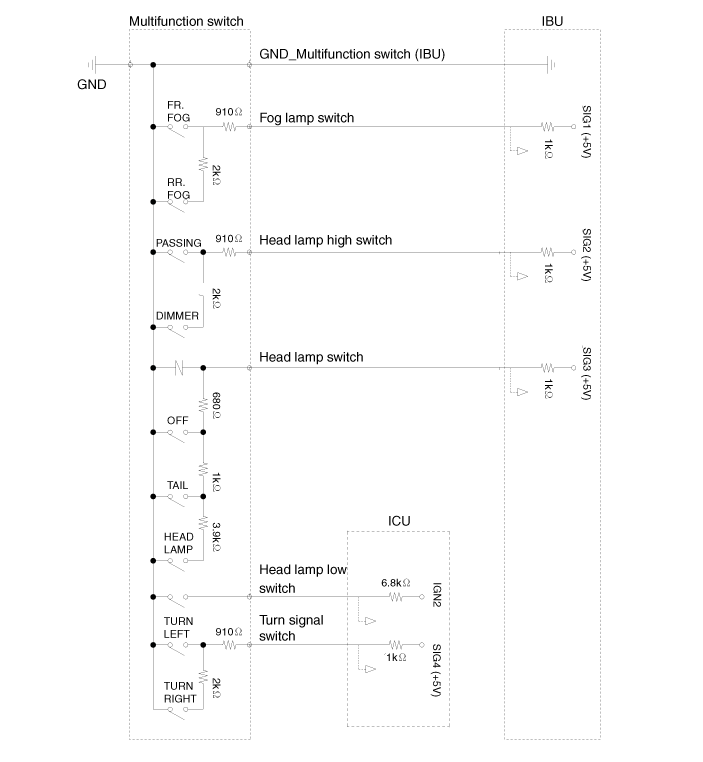
| Schematic Diagram |
Lighting System Schematic Diagram
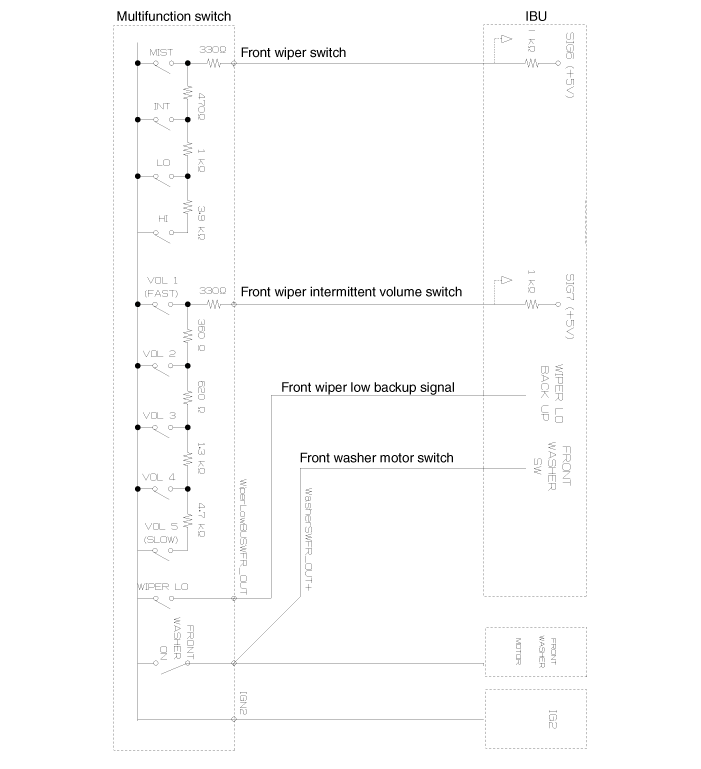
Wiper / Washer Schematic Diagram
Repair procedures
| Removal |
| 1. |
Disconnect the negative (-) battery terminal. |
| 2. |
Remove the clock spring. (Refer to Restraint - "Driver Airbag (DAB) Module and Clock Spring") |
| 3. |
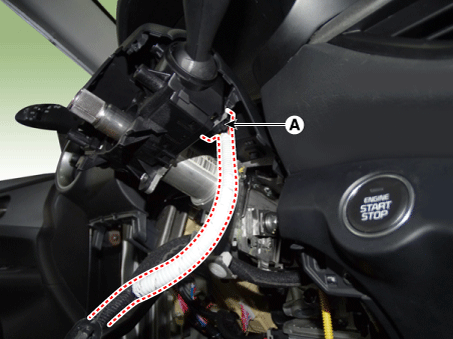
Disconnect the multifunction switch connector (A).
|
| 4. |
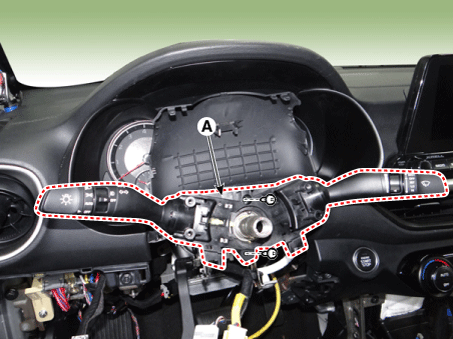
Remove the multifunction switch assembly (A) after loosening the screws.
|
| Installation |
| 1. |
Install in the reverse order of removal. |
| Inspection |
Multifunction Switch Inspection
| 1. |
Check for continuity between the terminals in each switch position according to the table.
|
 Mood Lamp Unit
Repair procedures
Removal
1.
Remove the front door trim.
(Refer to Body - "Front Door Trim")
2.
Disconnect the connector (A) from t ...
 Parking Distance Warning (PDW)
Specifications
Specification
Item
Specification
Ultrasonic sensor
Voltage rating
DC 12 V
Detecting ra ...
Other information:
Kia Forte 2019-2025 (BD) Service Manual: Antenna
Components and components location Components 1. Audio head unit 2. Glass antenna 3. Roof antenna 4. Antenna feeder cable Repair procedures Removal Glass Antenna Amplifier 1. Remove right rear pilar trim. (Re ...
Kia Forte 2019-2025 (BD) Owners Manual: Adjusting the height up and down
To raise the headrest, pull it up to the desired position (1). To lower the headrest, push and hold the release button (2) on the headrest support and lower the headrest to the desired position (3). ✽ NOTICE If you recline the seatback towards the front with the headrest and seat ...
Copyright © www.kiforte.com 2017-2025


