Kia Forte: Air Conditioning System / Condenser
Components and components location
| Components Location |
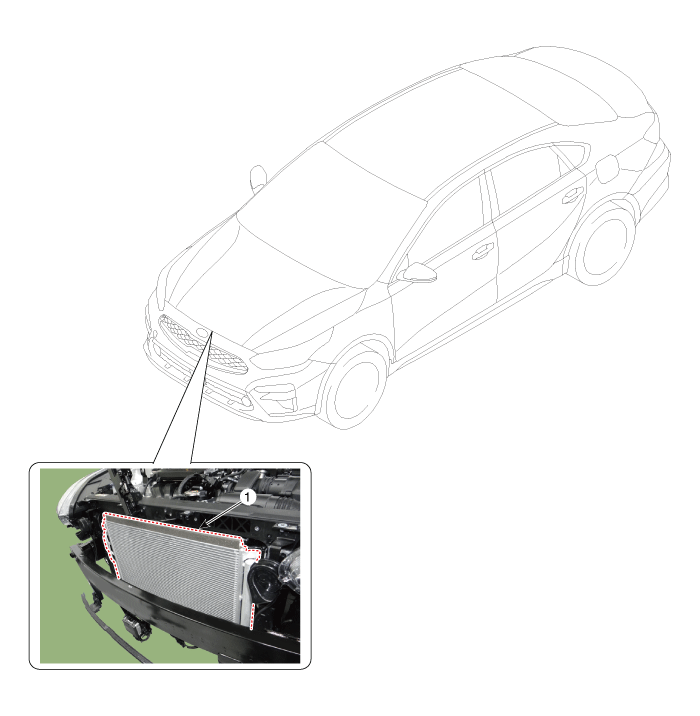
| 1. Condenser |
Repair procedures
| Inspection |
| 1. |
Check the condenser fins for clogging and damage. If clogged, clean them with water, and blow them with compressed air. If bent, gently bend them using a screwdriver or pliers. |
| 2. |
Check the condenser connections for leakage, and repair or replace it, if required. |
| Replacement |
| 1. |
Recover the refrigerant with a recovery / recycling / charging station. |
| 2. |
Disconnect the negative (-) battery terminal. |
| 3. |
Remove the hood latch assembly. (Refer to Body - "Hood Latch") |
| 4. |
Remove the front bumper. (Refer to Body - "Front Bumper Cover") |
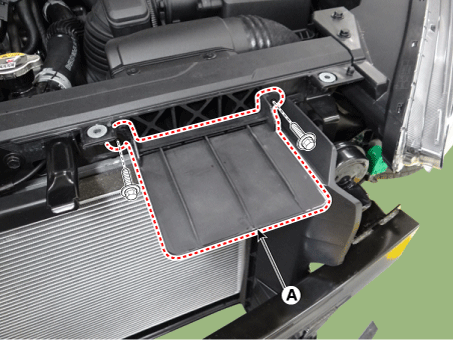
| 5. |
Remove the air duct extension (A).
|
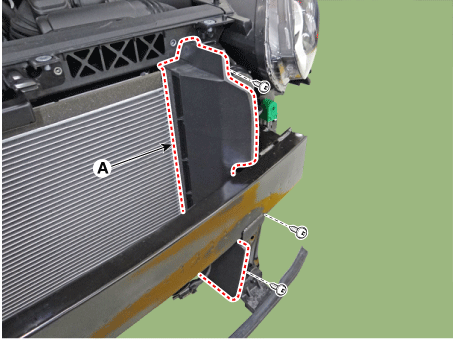
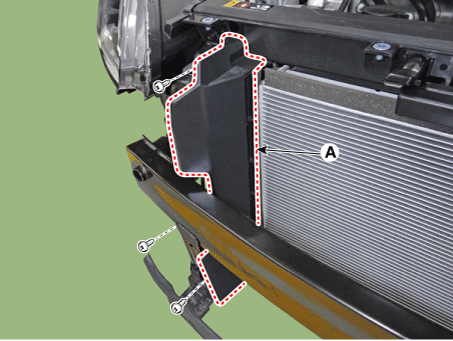
| 6. |
After loosening the mounting bolts and clips, remove the side air guard (A).
[LH]
[RH]
|
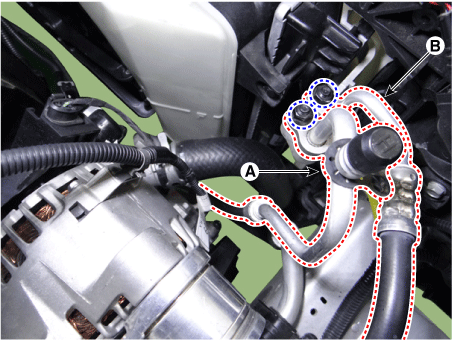
| 7. |
Remove the 2 nuts, and then disconnect the discharge line (A) and liquid line (B) from the condenser.
|
| 8. |
Loosen the mounting bolts and remove the radiator upper mounting bracket (A).
[LH]
[RH]
|
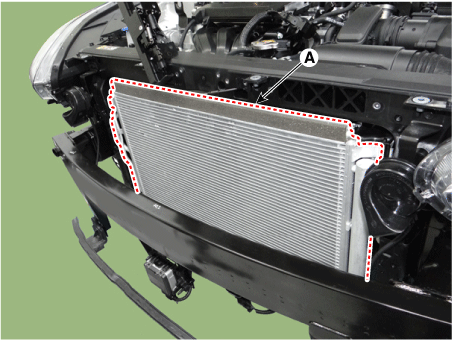
| 9. |
Remove the condenser (A) in the direction of the arrow after pushing the locking pins.
|
| 10. |
To install, reverse the removal procedure.
|

 Compressor
Description and operation
Description
The compressor is the power unit of the A/C system.
It is located on the side of engine block and driven by a V-belt of the engine.
The compres ...
 Receiver-Drier
Repair procedures
Replacement
1.
Remove the condenser.
2.
Remove the cap (A) on the bottom of the condenser with a L wrench.
...
Other information:
Kia Forte 2019-2025 (BD) Owners Manual: Seat belt - Driver's 3-point system with emergency locking retractor
To fasten your seat belt: To fasten your seat belt, pull it out of the retractor and insert the metal tab (1) into the buckle (2). There will be an audible "click" when the tab locks into the buckle. The seat belt automatically adjusts to the proper length only after the lap belt por ...
Kia Forte 2019-2025 (BD) Service Manual: Multimedia Jack
Schematic diagrams Connector and Terminal function Description and operation Description The multimedia jack on the console upper cover is for customers who like to listen to external portable music players like the MP 3 etc., through the vehicle's sound syste ...
