Kia Forte: Smart Key System / Smart Key Unit
Components and components location
| Components |
| [4DR] |
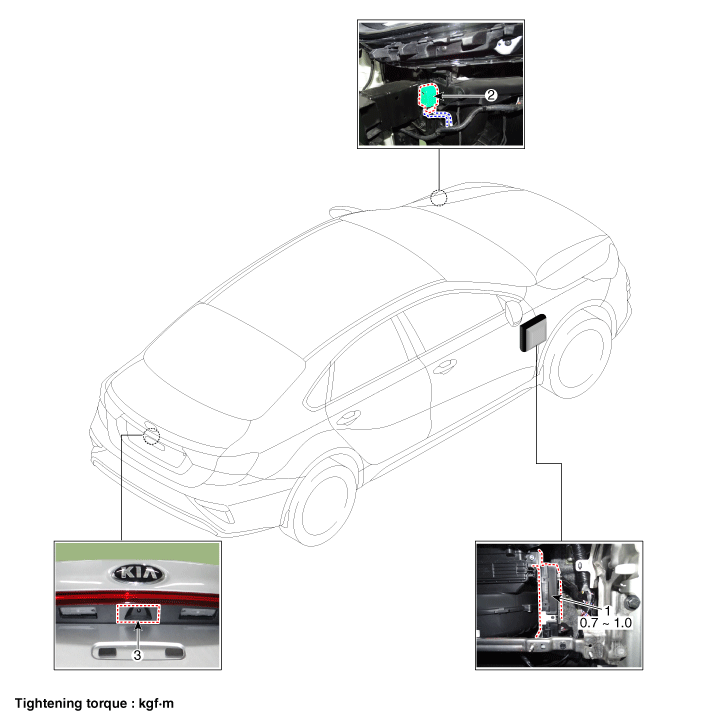
| 1. Integrated body control unit
(IBU) 2. Buzzer |
3 .Trunk lid handle |
| [5DR] |
| 1. Integrated body control unit
(IBU) 2. Buzzer |
3 .Trunk lid handle |
Schematic diagrams
| Connector and Terminal function |
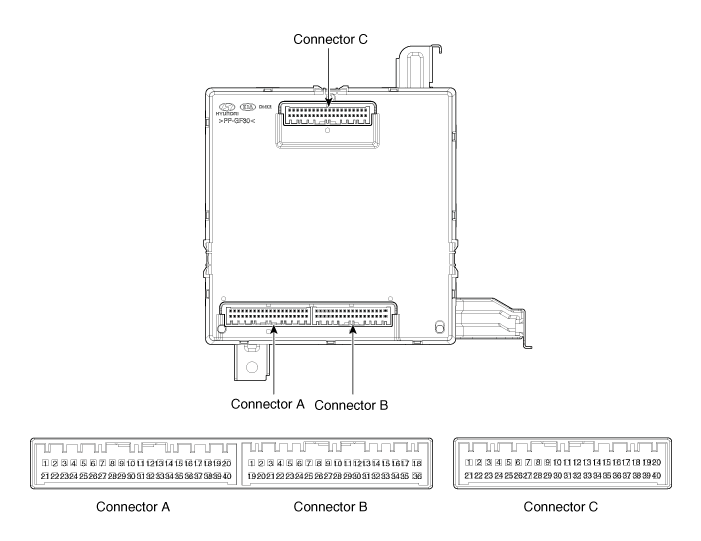
|
No. |
Connector A |
Connector B |
Connector C |
|
1 |
- |
Front washer switch_input |
Driver outside handle switch_input |
|
2 |
Puddle pocket lamp_output |
- |
Passenger outside handle switch_input |
|
3 |
- |
- |
FOB key searching signal_output (to WPC) |
|
4 |
- |
- |
- |
|
5 |
External buzzer_output |
- |
RPM_input |
|
6 |
Rear center seat belt indicator_output |
Wiper parking switch_input |
SSB illumination (+)_output |
|
7 |
Rear left seat belt indicator_output |
Security indicator_output |
ACC relay_output |
|
8 |
Rear right seat belt indicator_output |
Brake switch_input |
IGN 1 relay_output |
|
9 |
Passenger seat belt indicator_output |
Haptic_output |
IGN 2 relay_output |
|
10 |
Headlamp switch High_input |
Front wiper volume switch_input |
Start relay_output |
|
11 |
Outside mirror unfolding_output |
- |
Drive outside handle switch_output |
|
12 |
Outside mirror folding_output |
- |
Passenger outside handle switch_output |
|
13 |
- |
Dedicated DRL |
Interior antenna 1 (+)_output |
|
14 |
PDW alarm_output |
PDW option_input |
Interior antenna 2 (+)_output |
|
15 |
PDW-R power_output |
B-CAN_Low |
Interior trunk antenna 3 (+)_output |
|
16 |
PDW-F power_output |
B-CAN_High |
Rear bumper antenna (+)_output |
|
17 |
PDW power_input |
Power_ground |
- |
|
18 |
ESCL Enable_output |
ECU_ground |
- |
|
19 |
ESCL unlock switch_input |
- |
- |
|
20 |
ESCL (-)_output |
- |
- |
|
21 |
- |
- |
SSB switch 1_input |
|
22 |
KLINE_immobilizer |
- |
SSB switch 2_input |
|
23 |
- |
PDW switch indicator_output |
AT : 'P' position_input MT : IGN lock switch_input (clutch) |
|
24 |
- |
Front wiper switch_input |
ESCL_COM |
|
25 |
Sunroof status_input |
- |
Wheel speed sensor_input |
|
26 |
PDW switch_input |
Multifunction switch ground_input |
- |
|
27 |
- |
Wiper power relay_output |
- |
|
28 |
- |
Auto light sensor ground_output |
- |
|
29 |
- |
Auto light sensor signal_input |
- |
|
30 |
LIN 1 (PDW) |
Auto light sensor power_output |
Start feedback_input |
|
31 |
ESCL (+)_output |
- |
Driver outside handle switch antenna_output |
|
32 |
Light switch_input |
Front wiper high relay_output |
Passenger outside handle switch antenna_output |
|
33 |
Fog lamp switch_input |
Front wiper low relay_output |
Interior antenna 1 (-)_output |
|
34 |
IGN 2_input |
Front wiper low back up switch_input |
Interior antenna 2 (-)_output |
|
35 |
IGN 1_input |
P-CAN_Low |
Interior trunk antenna 3 (-)_output |
|
36 |
ASS_input |
P-CAN_High |
Bumper antenna (-)_output |
|
37 |
Power_battery (+) |
- |
- |
|
38 |
ECU_battery (+) |
- |
- |
|
39 |
Immobilizer antenna power_output |
- |
- |
|
40 |
Immobilizer antenna ground_output |
- |
- |
Repair procedures
| Removal |
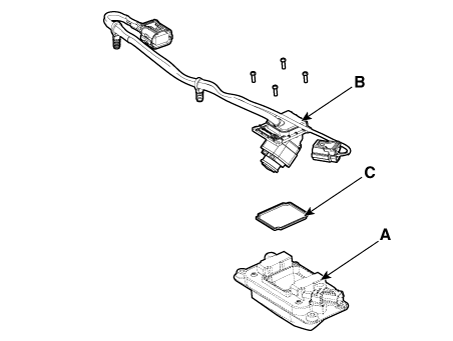
Integrated Body Control Unit (IBU)
Take care not to bend or scratch the trim and panels. |

| 1. |
Remove the crash pad lower panel. (Refer to Body - "Crash Pad Lower Panel") |
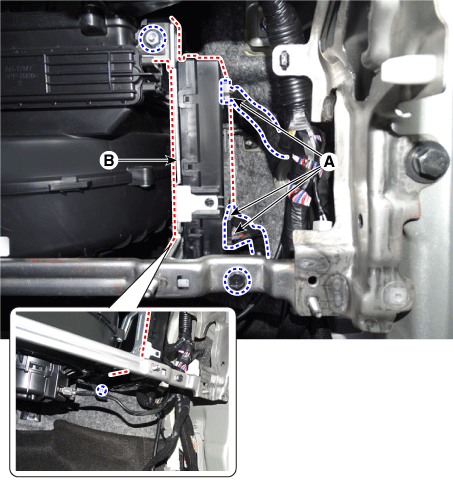
| 2. |
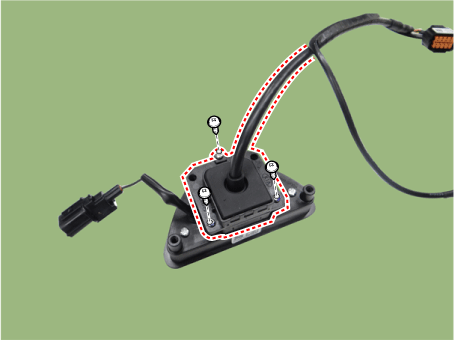
Remove the IBU (B) by loosening the mounting bolt and nut after disconnecting the connector (A).
|
Buzzer
| 1. |
Disconnect the negative battery terminal. |
| 2. |
Remove the under cover. Nu 2.0 MPI (Refer to Engine Mechanical System - "Engine Room Under Cover") Gamma 1.6 MPI (Refer to Engine Mechanical System - "Engine Room Under Cover") |
| 3. |
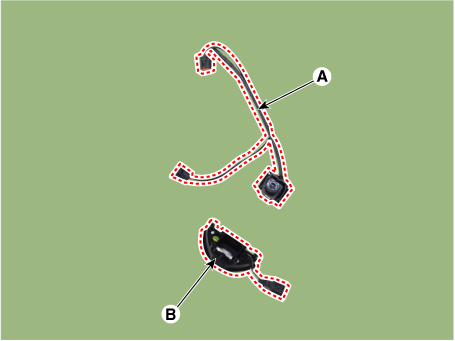
Remove the buzzer (A) after disconnecting the connector.
|
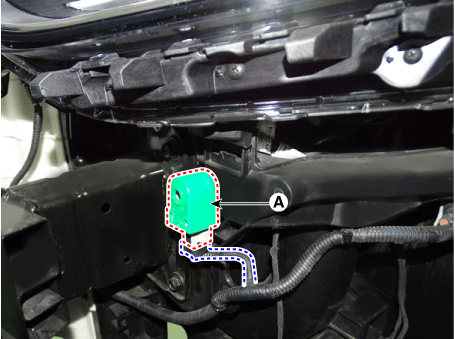
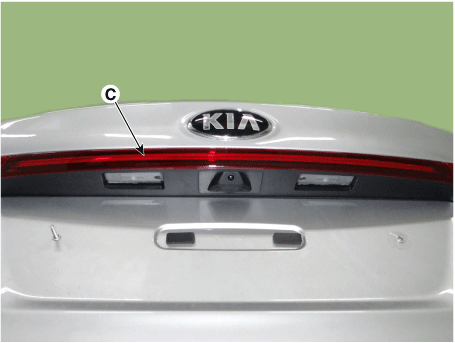
Trunk Lid Handle
| 1. |
Disconnect the negative battery terminal. |
| 2. |
Remove the trunk lid trim. (Refer to Body - "Trunk Lid Trim") |
| 3. |
Remove the inner rear combination lamp. (Refer to Lighting System - "Rear Combination Lamp") |
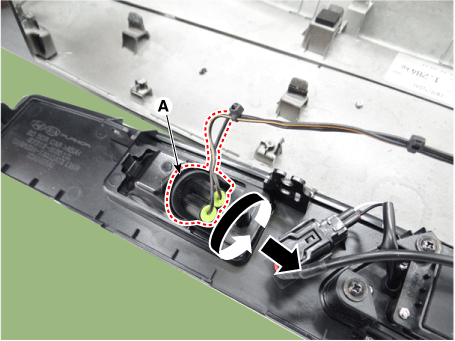
| 4. |
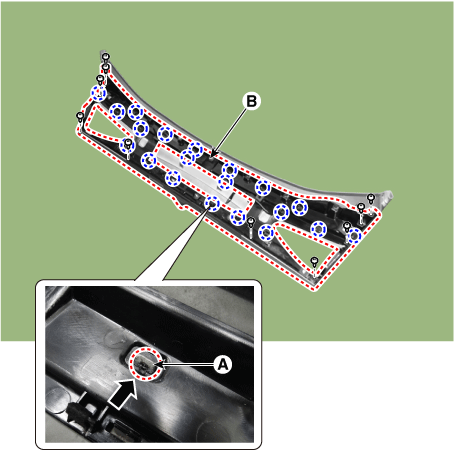
Remove the reflector (C) by loosening the nuts (B) after disconnecting the connector (A).
|
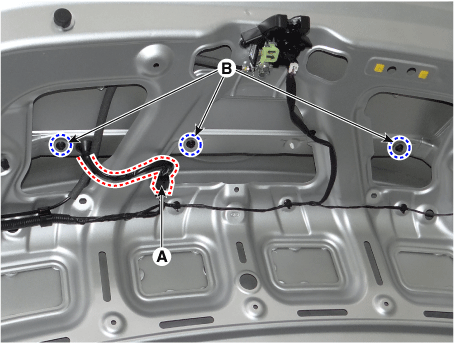
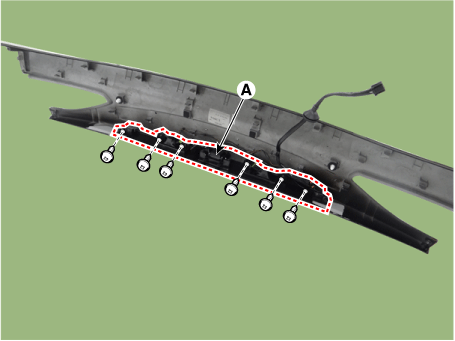
| 5. |
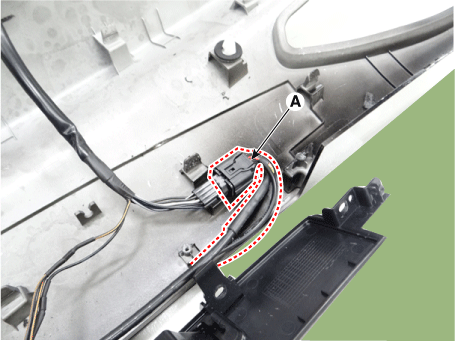
Remove the rear view camera & trunk lid handle assembly (B) by loosening the screws after disconnecting the connector (A).
|
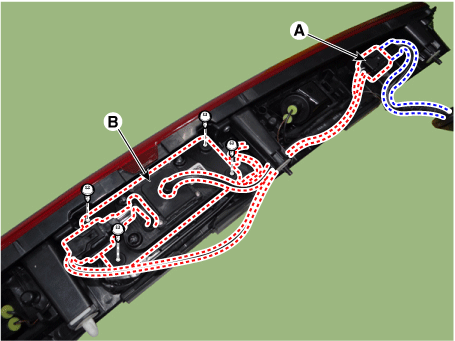
| 6. |
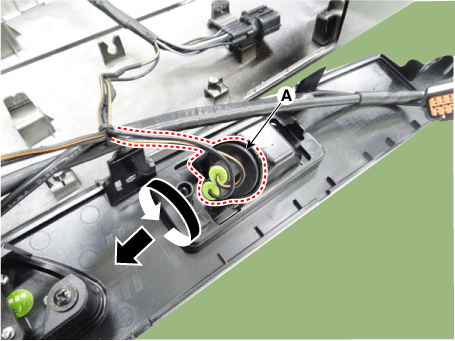
Remove the rear view camera (B) and silicon packing (C) by loosening the screws from the trunk lid handle (A).
|
Tailgate Lid Handle
| 1. |
Disconnect the negative battery terminal. |
| 2. |
Remove the tailgate back panel (Refer to Body - "Tailgate Back Panel") |
| 3. |
Loosen the tailgate garnish bracket mounting screws. |
| 4. |
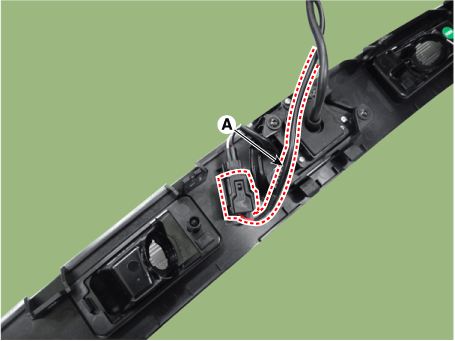
Remove the tailgate garnish bracket (B) by pushing the retaining hooks (A) in the direction of the arrow.
|
| 5. |
Disconnect the rear view camera connector (A).
|
| 6. |
Remove the license plate lamp socket (A) by rotating it in the counterclockwise. [LH]
[RH]
|
| 7. |
Remove the tailgate garnish back panel (A) after loosening the mounting screws.
|
| 8. |
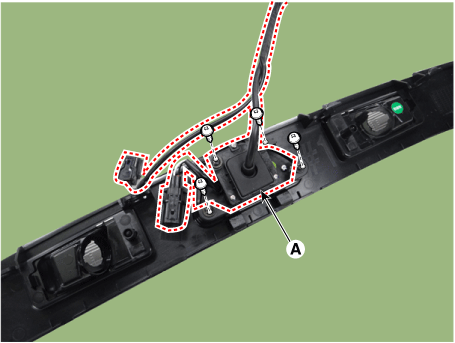
Disconnect the tailgate lid handle connector (A).
|
| 9. |
Remove the rear view camera & tailgate lid handle assembly (A) after loosening the mounting screws.
|
| 10. |
Loosen the rear view camera (A) mounting screws.
|
| 11. |
Remove the rear view camera (A) from the tailgate lid handle (B).
|
| Installation |
| 1. |
Install in the reverse order of removal. |
| Inspection |
Trunk Open Switch
| 1. |
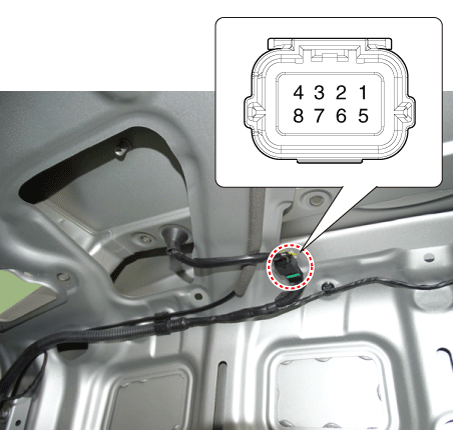
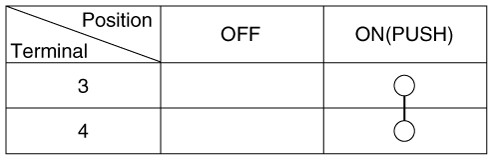
Check for continuity between the trunk open switch terminals.
|
| 2. |
If continuity is not specified, inspect the switch.
|
Tailgate Open Switch
| 1. |
Check for continuity between the tailgate open switch terminals.
|
| 2. |
If continuity is not specified, inspect the switch.
|
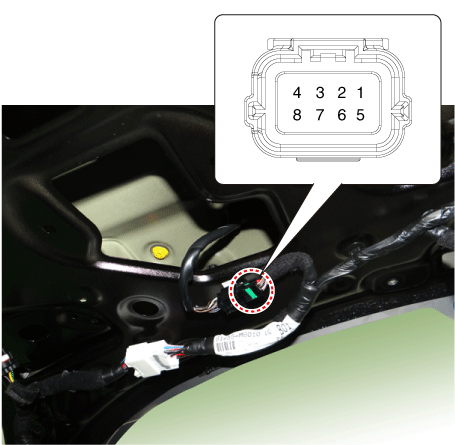
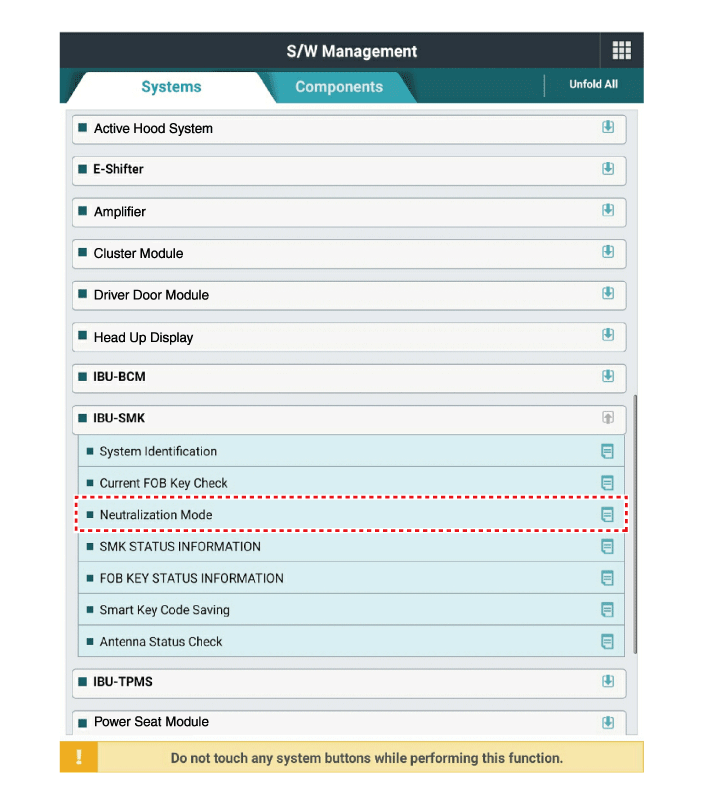
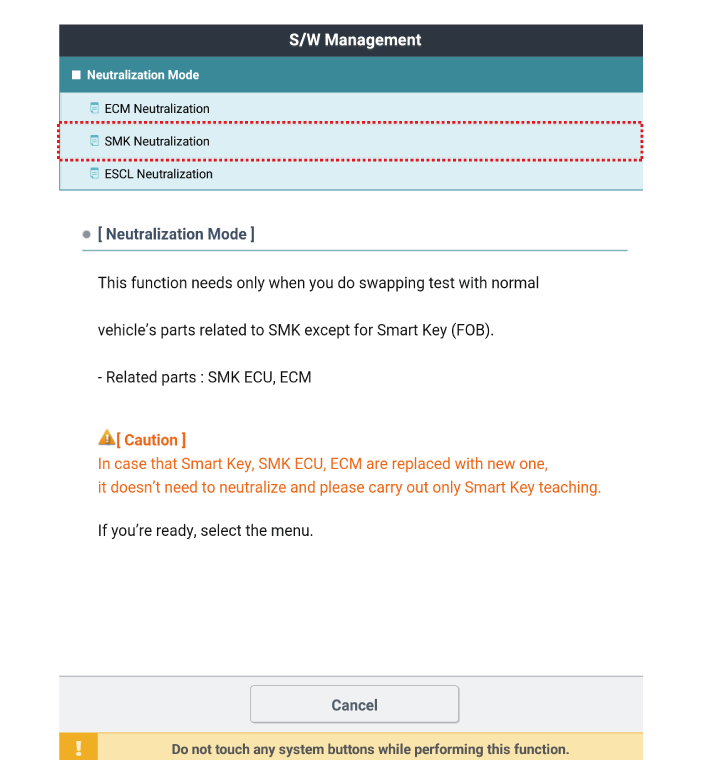
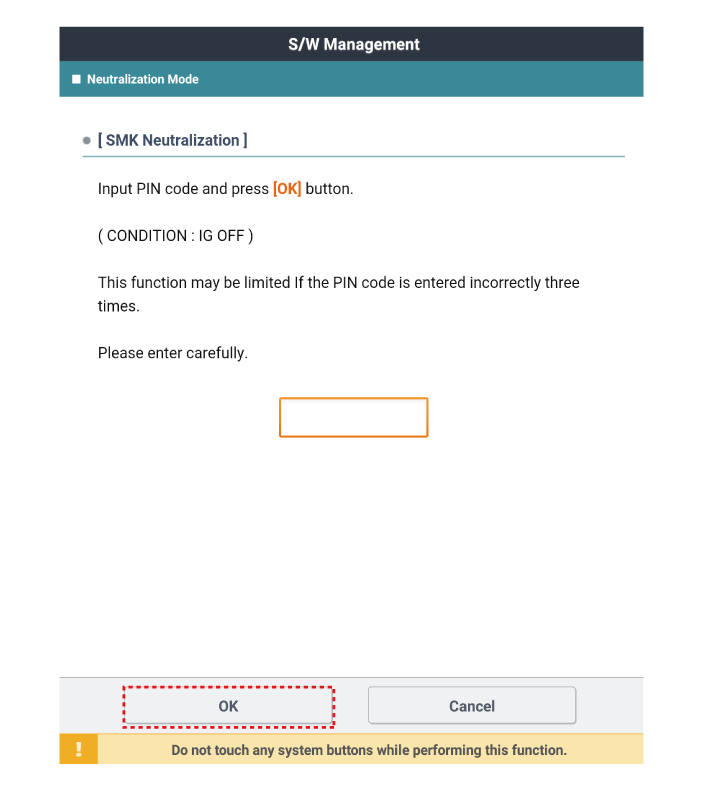
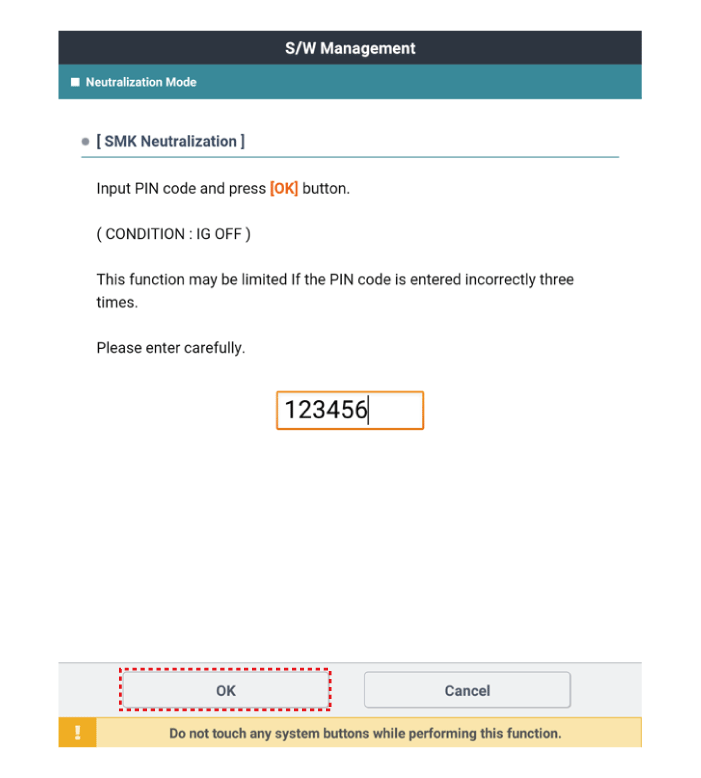
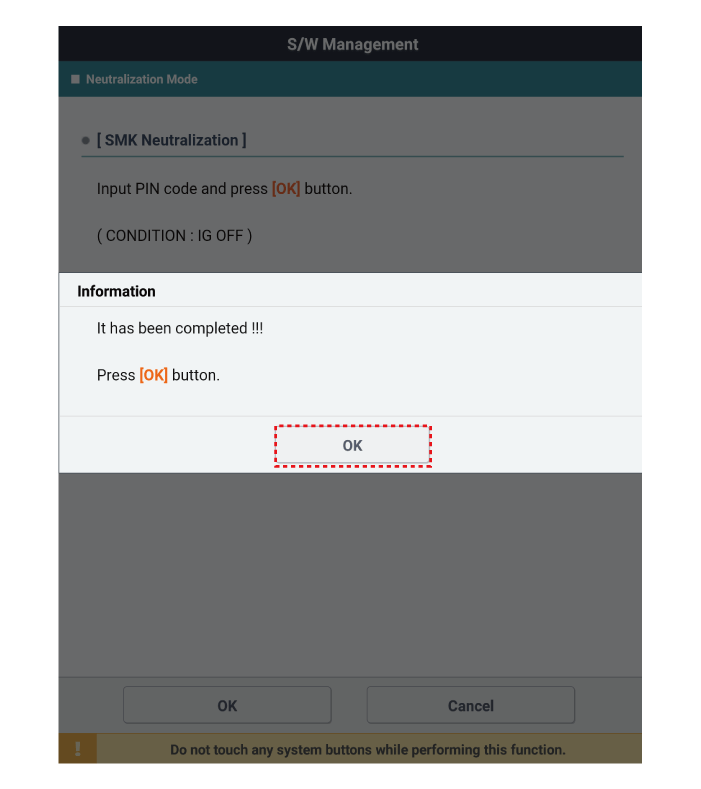
Smart Key Neutralization
| 1. |
Connect the cable of KDS to the data link connector in driver side crash pad lower panel. |
| 2. |
After IG ON, select the "Neutralization mode".
|
 Smart Key
Repair procedures
Smart Key
Smart Key Code Saving
1.
Connect the VCIⅡ of KDS to the data link connector (16 pins) in driver
side crash pad lower panel, turn the pow ...
 Smart Key Antenna
Repair procedures
Removal
Interior Antenna 1
Take care not to bend or scratch the trim and panels.
...
Other information:
Kia Forte 2019-2025 (BD) Service Manual: Blind-Spot Radar Switch
Schematic diagrams Circuit Diagram Repair procedures Inspection 1. Disconnect the BCW switch connector from the side crash pad switch. 2. Operate the BCW switch, then check for continuity between terminals and BCW swit ...
Kia Forte 2019-2025 (BD) Service Manual: General Service Information
General information Identification Number Locations Protection of the Vehicle Always be sure to cover fenders, seats, and floor areas before servicing. Insert the supportive rod into the hole at the edge of the h ...
