Kia Forte: DCT(Dual Clutch Transmission) System / DCT(Dual Clutch Transmission)
Components and components location
| Components |
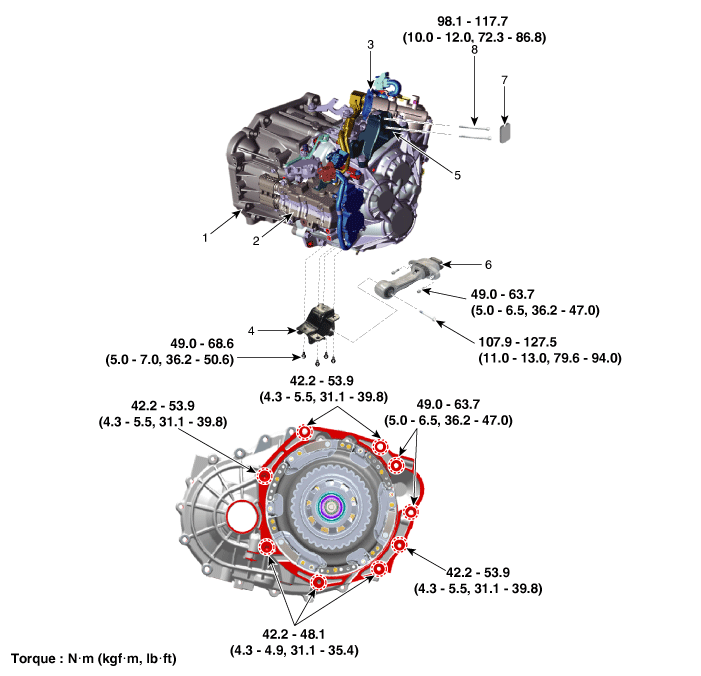
| 1. DCT (Dual Clutch Transmission)
assembly 2. Clutch actuator assembly 3. Gear actuator assembly 4. Roll rod support bracket |
5. DCT support bracket 6. Roll rod bracket 7. Dust cover 8. Support bracket mounting bolt |
| Video Clip |
External Damper Checking Method
& Assemble avoidance of wear point03:43

| Removal |
| 1. |
Remove the air cleaner assembly and air duct. (Refer to Engine Mechanical System - "Air cleaner") |
| 2. |
Remove the battery and battery tray. (Refer to Engine Electrical System - "Battery") |
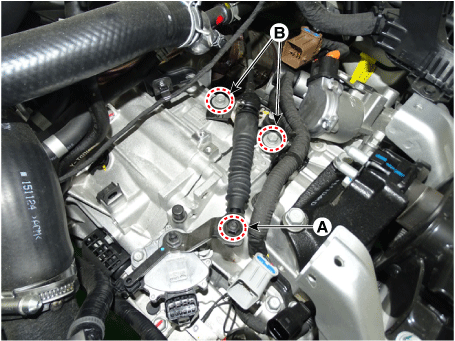
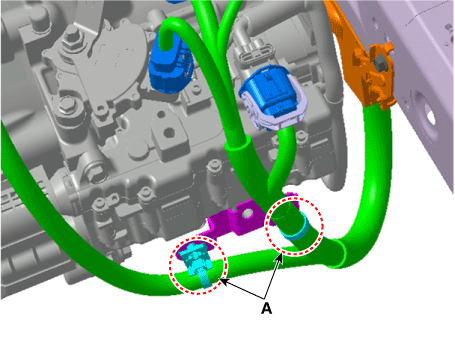
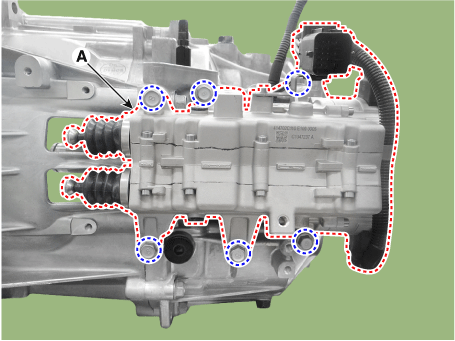
| 3. |
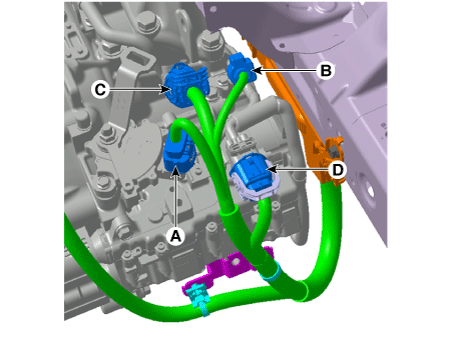
Disconnect the connectors (A, B ,C ,D) in the illustration below.
|
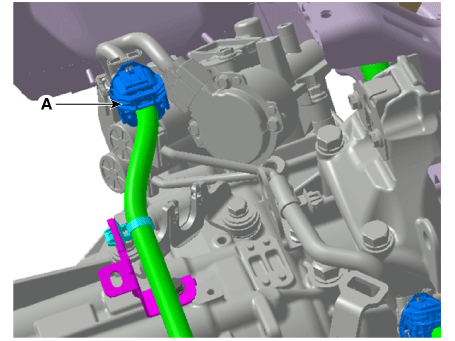
| 4. |
Disconnect the gear actuator motor connector (A).
|
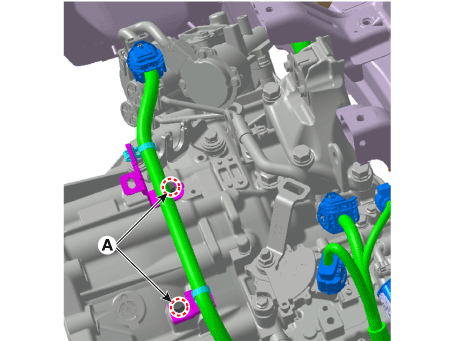
| 5. |
Remove the wiring bracket mounting bolts (A).
|
| 6. |
Remove the shift cable after loosening the bolts (A) and nut (B).
|
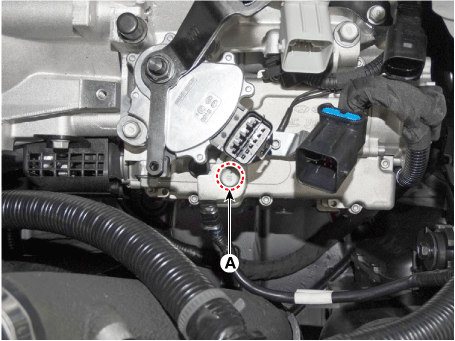
| 7. |
Loosen the ground bolt (A).
|
| 8. |
Loosen the transmission upper mounting bolts (A) and starter mounting bolts (B).
|
| 9. |
Remove the cowl top cover. (Refer to Body - "Cowl Top Cover") |
| 10. |
Assemble the engine support fixture on the engine room. (Refer to Special Service Tools - "Engine support fixture assembly drawing") |
| 11. |
Using the engine support fixture, hold the engine and transaxle assembly safely.
|
| 12. |
Support the transaxle safely on a jack.
|
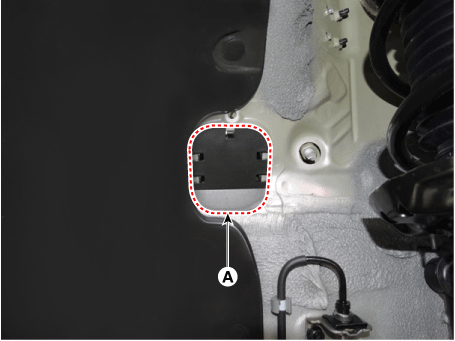
| 13. |
Remove the dust cover (A).
|
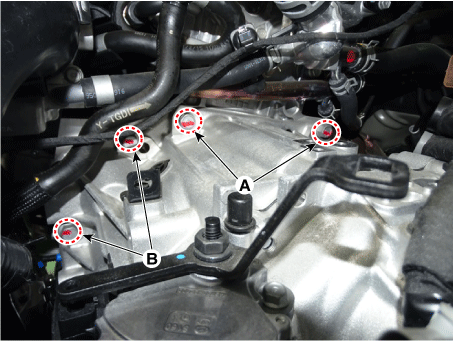
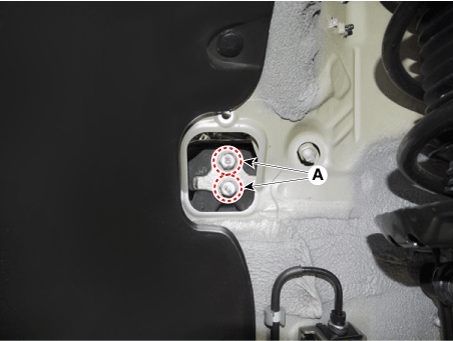
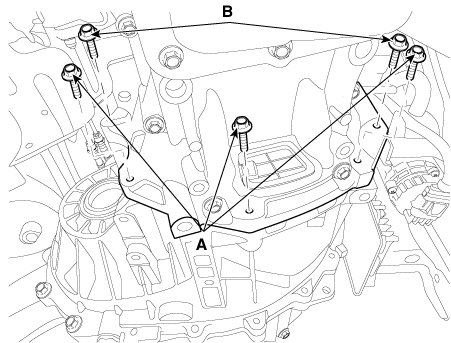
| 14. |
Loosen the transmission mounting bracket bolts (A).
|
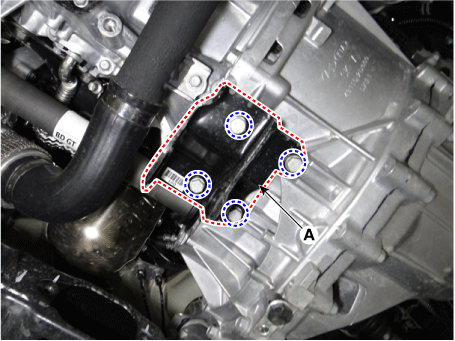
| 15. |
Remove the transmission support bracket (A).
|
| 16. |
Remove the under cover. (Refer to Engine Mechanical System - "Engine Room Under Cover") |
| 17. |
Remove the clips (A) from wiring bracket.
|
| 18. |
Remove the sub frame. (Refer to Suspension System - "Sub Frame") |
| 19. |
Remove the drive shaft assembly. (Refer to Driveshaft and Axle - "Front Driveshaft") |
| 20. |
Remove the vacuum pump. (Refer to Brake System - "Vacuum Pump") |
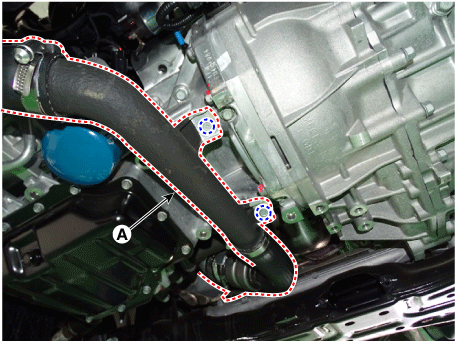
| 21. |
Remove the intercooler inlet hose & pipe (A).
|
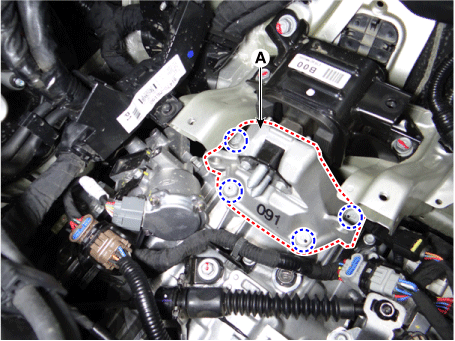
| 22. |
Remove the roll rod support bracket (A).
|
| 23. |
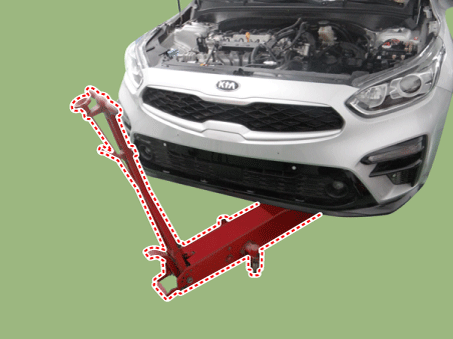
Support the transmission safely by using the jack. |
| 24. |
Loosen the transmission lower mounting bolts (A, B).
|
| 25. |
After separating the transmission from the engine, remove the transmission by lowering the jack slowly.
|

| 26. |
Remove the dual clutch assembly from the transmission. (Refer to Dual Clutch System - "Dual Clutch Assembly") |
| Installation |
| 1. |
Install in the reverse order of removal.
|


| 2. |
Observe each separate procedure below for reinstallation or replacement with a new dual clutch transmission. When reinstalling
When replacing with a new dual clutch transmission
|


 Transmission Gear Oil
Repair procedures
Inspection
Oil level check
1.
Remove the under cover.
(Refer to Engine Mechanical System - "Engine Room Under Cover")
2.
...
Other information:
Kia Forte 2019-2025 (BD) Service Manual: Refrigerant Line
Components and components location Components Location 1. Suction & Liquid tube assembly 2. Discharge hose Repair procedures Removal [Suction & Liquid tube assembly] 1. If the compressor is marginally operable, r ...
Kia Forte 2019-2025 (BD) Owners Manual: Lane Keeping Assist (LKA) system
The Lane Keeping Assist system is designed to detect the lane markers on the road with a front view camera at the front windshield, and assists the driver’s steering to help keep the vehicle in the lanes. When the system detects the vehicle straying from its lane, it alerts the dr ...
