Kia Forte: Interior Trim / Center Pillar Trim
Components and components location
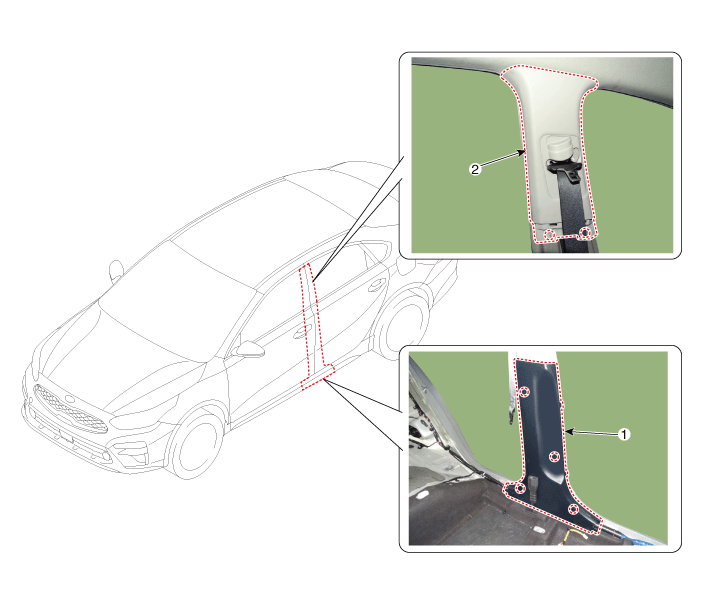
1. Center pillar lower trim
|
2. Center pillar upper trim
|
Repair procedures
[Center pillar lower trim]
| • |
Put on gloves to prevent hand injuries.
|
|
| • |
When removing with a flat - tip screwdriver or remover, wrap
protective tape around the tools to prevent damage to components.
|
| • |
When removing the interior trim pieces, use a plastic panel removal
tool not to damage the surface.
|
| • |
Take care not to bend or scratch the trim and panels.
|
|
| 1. |
Carefully remove the front door body side weatherstrip.
|
| 2. |
Carefully remove the rear door body side weatherstrip.
|
| 3. |
Remove the front door scuff trim.
(Refer to Interior Trim - "Door Scuff Trim")
|
| 4. |
Remove the rear door scuff trim.
(Refer to Interior Trim - "Door Scuff Trim")
|
| 5. |
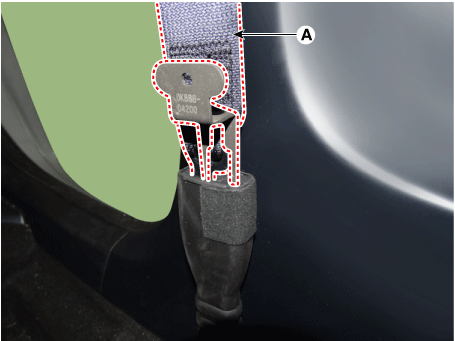
Remove the seat belt (A) from the EFD system by using the SST (0K888-D4200).
|
| 6. |
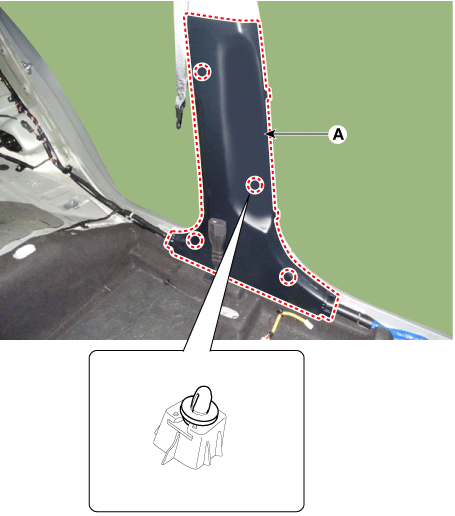
Using a screwdriver or remover, remove the center pillar lower trim (A).
|
| 7. |
To install, reverse the removal procedure.
|
Replace any damaged clips (or pin - type retainers).
|
|
[Center pillar upper trim]
|
Put on gloves to prevent hand injuries.
|
| • |
When removing with a flat - tip screwdriver or remover, wrap
protective tape around the tools to prevent damage to components.
|
| • |
When removing the interior trim pieces, use a plastic panel removal
tool not to damage the surface.
|
| • |
Take care not to bend or scratch the trim and panels.
|
|
| 1. |
Remove the center pillar lower trim.
(Refer to Interior Trim - "Center Pillar Trim")
|
| 2. |
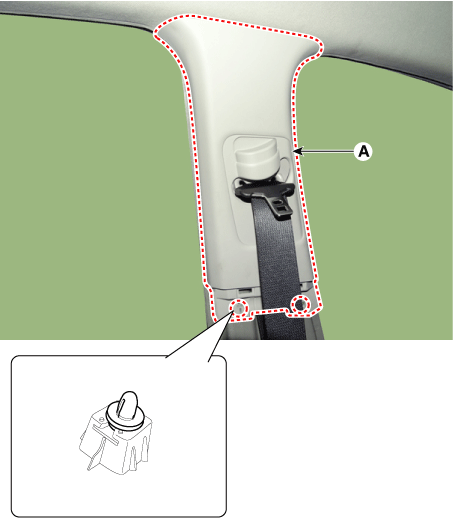
Using a screwdriver or remover, remove the center pillar upper trim (A).
|
| 3. |
To install, reverse the removal procedure.
|
Replace any damaged clips (or pin - type retainers).
|
|
Components and components location
Component Location
1. Front pillar trim
Repair procedures
Replacement
&nbs ...
Components and components location
Component Location
[4 Door]
1. Rear pillar trim
[5 Door]
1. Rear pillar trim
Rep ...
Other information:
The Lane Keeping Assist system is
designed to detect the lane markers
on the road with a front view camera
at the front windshield, and assists
the driver’s steering to help keep the
vehicle in the lanes.
When the system detects the vehicle
straying from its lane, it alerts the
dr ...
1. Open the hood.
2. Remove the bulb-socket from the
headlamp assembly by turning the
bulb-socket counterclockwise until
the tabs on the bulb-socket align
with the slots on the headlamp
assembly.
3. Remove the bulb from the bulbsocket
by pulling it out.
4. Insert a new bulb by inser ...


 Front Pillar Trim
 Rear Pillar Trim